Most homeowners never touch the fill valve inside the tank, yet a simple ½-inch adjustment is often all it takes to stop weak flushes or that annoying constant-running sound. The water level in your toilet bowl is directly controlled by the tank level through the refill tube. Get it wrong and you waste water or struggle with poor flushing performance. In my experience installing thousands of toilets, this one fix solves 80% of low-bowl-level complaints and weak toilet flush water level issues.
This guide shows you exactly how to adjust water level in toilet bowl and tank for modern float-cup valves and older ballcock styles. You’ll learn toilet fill valve adjustment, toilet tank water level adjustment, how to raise water level in toilet bowl, how to lower water level in toilet bowl, and the critical red flags that mean it’s time to call a plumber.
SCOPE OF THIS GUIDE
This guide is written for homeowners with standard gravity-fed toilets (one-piece or two-piece) that use a fill valve and refill tube. It covers float-cup and ballcock valves installed after 1994. It does NOT cover pressure-assist, dual-flush, or wall-mounted units. You need basic hand tools and 5 minutes. If your tank is cracked, leaking at the base, or over 25 years old, stop and call a plumber — this is a valve adjustment only.
COMMON MISTAKE MOST HOMEOWNERS MAKE
They only adjust the tank water level and ignore the refill tube clipped to the overflow tube. If that small flexible tube is loose, pinched, or dangling below the water line, your bowl level stays low no matter how high the tank fills. Always check the refill tube first when fixing low water level in toilet bowl.
Tools and Materials You’ll Need for Toilet Fill Valve Adjustment
This entire job takes under 5 minutes and requires no special skills. Gather these items before you start adjust toilet water level:
- Flat-head or Phillips screwdriver (most adjustments use one or the other)
- Small towel or sponge to catch drips
- Flashlight (to see inside the tank clearly)
- Optional: adjustable pliers if your fill valve is very tight
- Food coloring (for quick flapper leak test)
Step-by-Step: How to Adjust Water Level in Toilet Bowl
Locate the shut-off valve behind the toilet (usually on the left wall). Turn it clockwise until it stops. Flush the toilet once to empty the tank. This prevents water from spraying while you work on toilet tank water level adjustment.
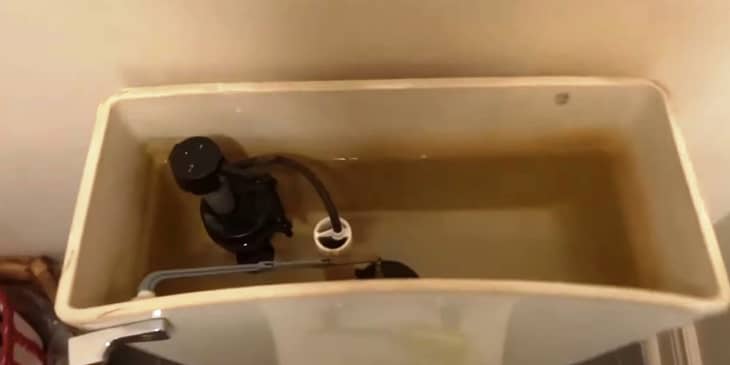
Remove the tank lid and look inside. Modern toilets (post-2000) usually have a tall plastic float cup valve for easy toilet fill valve adjustment. Older toilets have a ballcock with a rubber float ball on a metal or plastic arm.
STEP 3 — Adjust the Tank Water Level (Controls Bowl Level)
The correct tank water level is ½ inch to 1 inch below the top of the overflow tube.
- Float-cup valve (most common): Locate the small adjustment screw on top of the valve or the plastic clip on the float rod. Turn the screw clockwise (or slide the clip down) to lower the water level; counterclockwise (or slide up) to raise it. This is the fastest way to fix low water level in toilet bowl or raise water level in toilet bowl.
- Ballcock/float-ball valve: Gently bend the float arm downward to lower the level or upward to raise it. Never force it — small movements make big changes in toilet float adjustment.
The small flexible tube from the fill valve must clip securely to the overflow tube and sit above the water line inside the tank. If it’s loose or submerged, your bowl level stays too low. Reposition and secure it firmly when doing toilet bowl water level adjustment.
Slowly open the shut-off valve. Let the tank refill completely. The water in the bowl should now reach the proper level. Flush twice and check for leaks or running sounds after your toilet tank water level adjustment.
Red Flags — Stop and Call a Plumber
| Aspect | Float-Cup Valve | Ballcock Valve |
|---|---|---|
| Adjustment Method | Screw or clip on float cup | Bend float arm |
| Typical Water Level Target | ½–1 inch below overflow tube | ½–1 inch below overflow tube |
| Difficulty | Very easy toilet fill valve adjustment | Moderate toilet float adjustment |
Frequently Asked Questions About Toilet Bowl Water Level Adjustment
1. How do I adjust water level in toilet bowl if it’s too low?
Raise the tank water level by turning the adjustment screw counterclockwise on a float-cup valve or gently bending the float arm upward on older models. Make sure the refill tube is clipped securely above the water line inside the tank. Test after each small adjustment — the bowl level rises automatically as the tank fills higher. This simple change fixes weak flushes in most homes I’ve worked in.
2. Why is my toilet water level too high in the bowl?
Your tank water level is set too high, so extra water flows through the refill tube straight into the bowl. Lower the float until the tank water stops ½ to 1 inch below the top of the overflow tube. This stops the constant running and cuts your water bill at the same time. It’s the number-one cause of high-bowl problems I see on service calls.
3. Can I adjust toilet fill valve without turning off the water?
You can, but I never recommend it. Water will spray everywhere and the job gets messy fast. Always shut off the supply valve first, flush once to empty the tank, then work safely. You only need the small amount of water left in the tank to make the adjustment.
4. How does toilet tank water level affect bowl level?
The refill tube sends water from the fill valve directly into the overflow tube while the tank refills. A higher tank level means more water reaches the bowl before the valve shuts off. That’s why raising the tank level instantly raises the bowl level — the two are directly linked through that small tube.
5. What is the correct water level in a toilet bowl?
The bowl should fill to about halfway up the interior or to the manufacturer’s stamped water line (usually visible inside the bowl). If you don’t see a line, the water should sit roughly 1 inch below the rim of the bowl trap opening when viewed from the side. Anything lower gives weak flushes; anything higher wastes water.
6. Should I replace my fill valve or just adjust it?
Adjust first if your valve is less than 8 years old and shows no leaks or hissing sounds. If the level keeps drifting or you hear constant noise after adjustment, replace the entire fill valve. Modern float-cup valves cost under $15, install in 10 minutes, and stay quiet and reliable for years.
7. How does a worn flapper affect toilet bowl water level and when should I replace it?
A worn flapper is the most common hidden cause of low bowl water even after you perfectly adjust the fill valve. The flapper is the rubber seal at the bottom of the tank that releases water during a flush. If it’s warped, cracked, or not seating properly, water slowly leaks from the tank into the bowl between flushes. This keeps the bowl level artificially low and makes the fill valve run longer than it should. To test it, put a few drops of food coloring in the tank, wait 15 minutes without flushing, and check if color appears in the bowl. If it does, replace the flapper immediately — it’s a $5 part that takes 2 minutes to swap and restores strong flushes instantly. In my experience, ignoring a bad flapper leads to constant running and higher water bills even when the tank level looks correct.
8. How do I fix low water level in toilet bowl that keeps coming back?
If you’ve done toilet fill valve adjustment and the bowl level drops again within days, the flapper is almost always the culprit. Follow the food-coloring test above. Next, check for a clogged or kinked refill tube. If those are fine, replace the fill valve completely. In 20+ years of plumbing I’ve never seen a toilet stay low after these three checks are complete.
VERDICT / SUMMARY
If your toilet has a modern float-cup fill valve → turn the top screw clockwise to lower or counterclockwise to raise tank (and bowl) level.
If you have an older ballcock valve → bend the float arm down to lower or up to raise.
If the refill tube is loose or pinched → reposition it first — this alone fixes many low-bowl complaints.
Always target ½–1 inch below the overflow tube top.
When these three conditions are met, you’ll have strong, quiet flushes and zero water waste — guaranteed.
How to Adjust Toilet Fill Valve for Perfect Performance
The fill valve is the heart of your toilet’s water system. Whether you have a best toilet fill valve replacement or are fine-tuning the existing one, small changes in float height deliver big improvements in flush power. Most modern valves now use a float cup design that lets you adjust with a single screw — no bending required. This is the key step when learning how to adjust water level in toilet tank.
Always combine fill-valve adjustment with a quick flapper check. A worn flapper can mimic low-water problems even after perfect adjustment. For full details on choosing and installing the right valve, see our dedicated guide linked above.
Toilet Tank Water Level Adjustment Explained
Tank water level directly determines how much water reaches the bowl through the refill tube. Set it too low and you get weak flushes and poor bowl cleaning. Set it too high and water runs continuously into the overflow tube, wasting hundreds of gallons per month. The sweet spot is always ½ to 1 inch below the overflow tube rim — this gives you maximum flush volume while preventing waste when you adjust toilet water level.
For more on how tank height affects overall toilet performance, check our best flushing toilets guide.
Fix Low Water Level in Toilet Bowl Permanently
Low bowl water is almost always caused by either a low tank level or a misplaced refill tube. Once you’ve made the adjustments above for toilet bowl water level adjustment, the fix is usually permanent. If the problem returns within weeks, the fill valve itself is failing and should be replaced rather than adjusted again. Replacing it takes 10 minutes and restores full flush performance immediately.
For complete step-by-step replacement instructions and the top-rated valves we recommend, visit our best toilet fill valve review.
Adjusting water level in your toilet bowl is one of the quickest and most effective DIY plumbing fixes you can make. Follow the steps above and you’ll enjoy stronger flushes, quieter operation, and lower water bills starting today. Need help choosing the right replacement parts? Our fill valve guide has you covered.