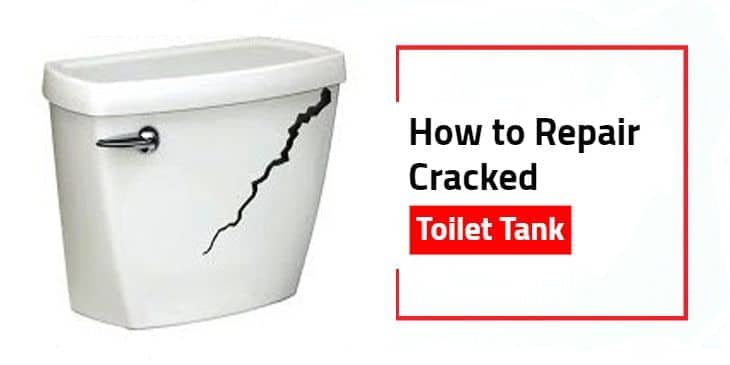
Most homeowners treat every crack in a toilet tank the same way — they reach for a tube of silicone and hope for the best. That approach works on exactly one type of crack out of four. Apply it to the wrong crack, and you are sealing a problem that will fail under water pressure at 2 a.m. and leave you with a flooded bathroom floor and a repair bill that runs $500 to $3,000 before the plumber leaves.
The crack type determines everything: whether repair is possible, which product to use, how long the cure window is, and whether skipping straight to replacement is the smarter financial decision. To repair a cracked toilet tank correctly, you must classify the crack before touching any product. This guide breaks down the entire process — from crack diagnosis through pressure testing — using the same decision framework professional plumbers apply on service calls.
This guide covers toilet tanks made from vitreous china or porcelain, which accounts for virtually every residential toilet sold in the United States since 1970. It covers DIY repair for hairline and surface cracks above and at the waterline. It does not cover cracked toilet bowls, cracked flanges, or tank damage caused by freeze-burst.
If the crack runs through a bolt hole, under a mounting boss, or along the tank bottom, this guide will confirm that repair is not a viable option and walk you through the replacement path instead.
📋 Scope — Who This Guide Is For
Tools required: Flathead screwdriver, adjustable wrench, wet/dry shop vac or sponge, isopropyl alcohol (90%+), 400-grit wet-dry sandpaper, lint-free cloths, mixing surface for epoxy, heat gun or hair dryer (optional for accelerating drying).
Experience level assumed: Basic DIY comfort — you have shut off a supply valve before and are comfortable working in a tight space behind a toilet tank.
This guide does NOT cover: Cracked toilet bowls, cracked flanges, hairline cracks in tank bottoms, cracks caused by freeze damage (structural by nature), or repairs to plastic tanks found on some low-cost toilets.
When to hire instead: If the crack is longer than 3 inches, below the waterline on the interior, runs through or near a bolt hole or the flush valve seat, or if you see the crack widening when you tighten tank bolts — stop. Professional repair or tank replacement is the correct path. A service call to repair a cracked toilet tank runs $150 to $300; tank replacement with a plumber runs $200 to $400 installed.
⚠️ The Most Common Mistake — Skipping the Diagnosis Step
Homeowners skip straight to applying sealant without determining whether the crack is hairline, surface, or structural. A structural crack — one that penetrates through the full porcelain thickness — cannot hold a water seal under constant hydrostatic pressure regardless of which product is applied. Epoxy on a structural crack buys days to weeks before reopening. The correct sequence is always: diagnose the crack type first, then decide repair vs. replace, then select the product. This guide follows that sequence exactly.
Why Toilet Tank Cracks Happen — And Why the Cause Matters for Repair
Vitreous china is extremely hard and non-porous but brittle under point-load stress. Understanding what caused the crack tells you whether the repair is likely to hold or whether the same force will re-crack the tank after repair. The four primary causes each leave a different crack signature.
Impact damage is the most common cause. Dropping the tank lid, bumping the tank with a heavy object, or a child using the tank as a step generates a concentrated point load that radiates outward from the impact site. These cracks tend to be short (under 2 inches) and often hairline at the surface, even if they penetrate deeper. Impact cracks on the upper half of the tank — above the waterline — have the best repair prognosis.
Overtightened tank bolts cause cracks that originate at or near the bolt holes on the tank floor and radiate outward. The bolt hole area sits directly in the water column, and any crack near it must be treated as potentially structural. If you replaced the fill valve recently and overtightened the lock nut, check the tank base interior for hairline spiderwebbing around the bolt seats. These cracks rarely respond well to DIY repair.
Thermal stress develops when very hot water contacts a cold porcelain interior repeatedly over years. The resulting cracks tend to be fine, parallel, and horizontal across the mid-section of the tank. Single shallow thermal cracks above the waterline can be sealed. A network of thermal cracks (crazing) indicates the tank is approaching the end of serviceable life.
Age and manufacturing stress accounts for cracks that appear with no visible cause. Porcelain fired with internal micro-voids gradually develops fractures under the constant vibration of water cycling in and out. Tanks over 20 years old that develop spontaneous cracks should be evaluated for replacement rather than repair — the underlying material condition is compromised beyond what epoxy can address long-term.
Tools and Materials Needed to Repair a Cracked Toilet Tank
Before starting to repair a cracked toilet tank, gather everything listed here. Having to stop mid-repair to get a supply allows moisture to re-enter the crack and ruins surface prep.
🔧 Tools
- Flathead screwdriver
- Adjustable wrench
- Wet/dry shop vac or large sponge
- Lint-free cloths (microfiber or cotton)
- 400-grit wet-dry sandpaper
- Small stiff-bristle brush
- Toothpick or plastic syringe (for hairline cracks)
- Hair dryer or heat gun (low setting)
- Flashlight or headlamp
- Permanent marker (for tracing crack path)
🧪 Materials
- Isopropyl alcohol — 90% or higher (not rubbing alcohol)
- Two-part marine or porcelain epoxy (see Step 4)
- Fiberglass mesh tape (for cracks wider than hairline)
- Porcelain touch-up paint (optional — cosmetic)
- Paper towels for cleanup
- Nitrile gloves
- Plastic mixing surface (old credit card or cardboard)
On product selection: two-part marine epoxy rated for continuous water immersion outperforms single-part silicone for this application. Products labeled for ceramic, porcelain, or vitreous china with a minimum bond strength of 3,000 PSI and rated for potable water contact are the correct choice for internal tank repairs.
Single-part silicone sealants and cyanoacrylate (super glue) are external-surface temporary options only — neither holds reliably under constant hydrostatic pressure inside the tank.
Step 1 — Diagnose the Crack: Hairline, Surface, or Structural?
This step takes 10 minutes and determines every decision that follows. Do not skip it. The single most important thing you do when you repair a cracked toilet tank is correctly classify the crack before selecting any product.
Step 1A — Drain the Tank and Remove the Lid
Shut off the supply valve (the football-shaped valve behind the toilet at the wall). Flush once to empty the tank. Use a sponge or wet vac to remove the remaining 1–2 inches of water in the tank bottom. Remove the tank lid and set it on a towel to avoid chipping. The tank must be fully empty for accurate crack diagnosis — water in the tank can disguise surface cracks as through-cracks and vice versa.
Step 1B — Trace the Full Crack Path
Use a flashlight to examine the crack from both inside and outside the tank. Use a permanent marker to trace the visible crack path. This establishes the full extent of the crack before repair and lets you confirm after repair that the sealant fully bridged the marked path. Measure the crack length in inches and note its location relative to the waterline (the mineral line inside the tank that shows the normal water level).
Step 1C — Classify the Crack Using These Three Criteria
Hairline crack: Visible as a fine line on the exterior glaze. Width under 0.5mm. A thumbnail dragged across the crack catches slightly but does not drop into a channel. These penetrate the glaze layer only or extend into the porcelain body without fully transecting it. Hairline cracks above the waterline are the best candidates for DIY repair with a 70–80% long-term success rate when properly executed.
Surface crack: Visible gap that a fingernail tip drops into. Width 0.5mm to 2mm. May or may not penetrate the full porcelain wall. To test for full penetration: dry the inside and outside surfaces around the crack, then apply a small amount of water to the exterior side. If water appears inside the tank within 30 seconds, the crack is full-thickness. If it does not, the crack is surface-deep. Surface cracks above the waterline that are not full-thickness can be repaired.
Structural crack: Any crack that runs through or within 1 inch of a bolt hole; runs along the tank base; is longer than 3 inches; shows visible separation (you can insert a razor blade); or causes the tank to flex when gentle hand pressure is applied. Structural cracks cannot be reliably repaired with any consumer product. Proceed to replacement.
⚠️ Diagnosis Warning
If the crack location makes you uncertain about classification — particularly any crack below the waterline or near hardware — treat it as structural and evaluate tank replacement. The cost of a replacement tank for most common two-piece toilets runs $50 to $150 for the part, plus $100 to $200 for a plumber to install. That is far less than water damage remediation after a failed repair.
Step 2 — Drain and Dry the Tank Completely
Step 2A — Remove All Residual Water
After the initial flush and sponge pass, use dry lint-free cloths to absorb remaining moisture from every surface in the tank — the walls, floor, and around the fill valve base. Pay particular attention to the area around the crack itself. Even a thin moisture film between porcelain and epoxy destroys adhesion. Most epoxy bond failures on toilet tanks trace back to incomplete drying, not product quality.
Step 2B — Accelerate Drying with Controlled Heat
Use a hair dryer on the low setting or a heat gun on the lowest setting, held 6 inches from the tank surface, for 5 to 8 minutes. Move the heat source continuously — stationary heat on vitreous china can cause thermal shock and worsen the crack. After heat drying, allow the tank to sit open and ventilated for a minimum of 30 minutes before proceeding.
For tanks with internal condensation insulation (foam lining), remove any wet foam pieces around the crack area before drying. Damp foam against the crack surface will prevent full curing even if the porcelain surface appears dry.
⚠️ Do Not Rush Drying
Porcelain is porous at the microscopic level. Moisture wicks into the crack channel and requires time to fully evaporate — especially in humid bathrooms. If you are working in a bathroom with ambient humidity over 60%, run a fan or dehumidifier in the room during the drying period. Epoxy applied to a surface with residual moisture will appear to set but will delaminate from the porcelain under water contact within days.
Step 3 — Clean and Prepare the Crack Surface
Step 3A — Sand the Crack Area
Using 400-grit wet-dry sandpaper, lightly abrade the area around the crack — 1 inch on either side — on both the interior and exterior tank surfaces. The goal is to roughen the glazed porcelain to create mechanical adhesion for the epoxy. The glaze on vitreous china is extremely smooth and chemically inert; epoxy applied directly to an unsanded glaze surface bonds at roughly 40% of its rated strength. After sanding, wipe away all dust with a dry cloth.
Step 3B — Degrease with Isopropyl Alcohol
Soak a lint-free cloth in isopropyl alcohol at 90% concentration or higher. Standard rubbing alcohol at 70% leaves a water residue that undermines epoxy adhesion. Wipe the entire sanded area, including directly into the crack as far as the cloth can reach. Allow to fully evaporate — 2 to 3 minutes at room temperature. Do not touch the prepared surface with bare fingers after this step. Skin oils compromise the bond at contact points.
Step 3C — Drill a Stop-Hole (Surface Cracks Only — Optional but Recommended)
For surface cracks that are not hairline — any crack where a fingernail tip catches — drilling a small stop-hole at each end of the crack prevents the crack from propagating further under water pressure vibration. Use a diamond-tipped rotary bit (1/16 inch diameter) at low speed. Drill at the extreme end of the crack, not the center.
Keep the bit wet with water while drilling to prevent heat buildup. This step adds 15 minutes but significantly extends the life of the repair by eliminating the stress concentration point at each crack tip.
Step 4 — Apply the Right Repair Material for the Crack Type
Product selection is determined by crack classification from Step 1. Using the wrong product is the second most common cause of repair failure after insufficient drying.
Hairline Cracks — Two-Part Clear Epoxy with Syringe Application
For hairline cracks where the gap is too narrow for brush or spatula application, a two-part epoxy with a low-viscosity mixed state is the correct product. Mix equal parts of resin and hardener on a non-porous surface according to the manufacturer’s instructions — typically 1 to 2 minutes of thorough blending. Load the mixed epoxy into a plastic syringe and apply directly into the crack with light pressure.
The low viscosity allows capillary action to draw the epoxy into the crack channel. Apply to both interior and exterior surfaces. Use a toothpick to work the epoxy along the crack path you marked in Step 1. The finished bead should sit slightly proud of the surface — do not attempt to feather it flat until after initial set (typically 4 to 5 hours depending on the product).
Surface Cracks (Not Full-Thickness) — Two-Part Marine Epoxy Paste with Mesh Reinforcement
For cracks wider than hairline but confirmed not full-thickness, use a two-part marine epoxy in paste form rated for porcelain. Apply a first layer into the crack channel, then embed a 1-inch strip of fiberglass mesh tape into the wet epoxy across the crack.
The mesh bridges the gap and distributes any future stress across the repair rather than re-concentrating it at the original crack tip. Apply a second epoxy layer over the mesh and feather the edges. This two-layer mesh approach is standard in professional porcelain crack repair and adds meaningful durability compared to a single application without reinforcement.
What NOT to Use — And Why
Single-part silicone sealant: Does not bond to glazed porcelain without primer and peels under constant water submersion. Acceptable as a temporary exterior-surface patch to stop active dripping while you plan the actual repair or replacement — not a permanent solution.
Cyanoacrylate (super glue): Achieves initial bond quickly but is brittle, lacks flexibility, and degrades under continuous water exposure. Typically fails within 2 to 8 weeks on an interior tank crack.
Hydraulic cement: Designed for concrete, not vitreous china. Will not bond to glazed porcelain and has no elasticity to accommodate the micro-vibration of a filling tank.
Step 5 — Cure, Refill, and Pressure Test
Step 5A — Allow Full Cure Time Before Restoring Water
Do not restore water supply until the epoxy has reached full cure strength. Initial set (when the epoxy is firm to the touch and can be sanded) occurs in 4 to 6 hours for most two-part marine epoxy formulations. Full cure — where the bond reaches rated strength — requires 24 hours at room temperature (68–77°F).
Lower temperatures extend cure time: at 55°F, most epoxies require 48 hours for full strength. Restoring water at initial set rather than full cure is the third most common cause of repair failure. The hydrostatic pressure of a filling tank exceeds what a partially cured epoxy bond can hold.
Step 5B — Sand and Inspect the Cured Repair
After full cure, use 400-grit sandpaper to smooth the epoxy flush with the surrounding surface. Examine the repair under good light. The epoxy should appear fully opaque and continuous across the crack path. Any voids, bubbles, or areas where the crack is still visible through the cured epoxy require a second application. Allow the second application to fully cure before proceeding to the pressure test.
Step 5C — The Pressure Test That Confirms Success or Failure
Restore the water supply slowly by opening the supply valve one half-turn. Allow the tank to fill to the standard water line. Do not flush. Lay a dry paper towel flat against the exterior tank surface over the repair location and press it lightly for 30 seconds. Remove and inspect for moisture transfer.
If the towel shows no moisture at the repair point: open the supply valve fully, allow the tank to complete a normal fill cycle, then flush once. After the second full refill, repeat the paper towel test. A clean result at this stage indicates a successful repair. Mark the repair date and monitor weekly for the first month.
⚠️ What Moisture at the Repair Point Means
If the paper towel shows moisture at the repair location during the pressure test, the repair has not sealed the crack completely. Shut off the supply valve, drain the tank, and assess whether the crack classification was correct. Full-thickness cracks that were initially diagnosed as surface cracks will show this failure pattern. At this point, tank replacement is the appropriate next step. Do not attempt a third application — repeated epoxy layering on an active-leak crack does not improve the outcome.
Red Flags — Stop and Call a Plumber
The following conditions indicate that attempting to repair a cracked toilet tank yourself is outside the scope of safe DIY procedures. Each represents a real risk of bathroom flooding, structural water damage, or further porcelain failure. If you identify any of these conditions, shut off the supply valve and contact a licensed plumber.
🚨 Red Flag 1 — Crack Through or Within 1 Inch of a Bolt Hole
Tank bolts carry the combined weight of the full water tank (typically 15 to 20 lbs of water) and the mechanical stress of every flush cycle. A crack that intersects or closely approaches the bolt hole area compromises the structural integrity of the tank base. Epoxy applied here cannot restore the tensile strength of intact porcelain. The tank can crack further and drop from the bowl — a catastrophic failure that releases the full tank volume instantly. Replace the tank.
🚨 Red Flag 2 — Crack Wider Than 2mm or Longer Than 3 Inches
Cracks of this size have displaced porcelain edges that no longer align flush. Even with fiberglass mesh reinforcement, the epoxy is bridging a gap rather than sealing a contact surface — a fundamentally different mechanical situation. Under the hydrostatic pressure of a full tank (approximately 0.43 PSI per vertical inch of water depth), bridged epoxy will fail progressively at the edges of the gap. Replace the tank.
🚨 Red Flag 3 — Crack Located on the Interior Bottom of the Tank
The tank floor sits in constant full-depth water submersion and bears the highest water pressure of any tank surface. Cracks in this location are also frequently associated with overtightened tank bolts, which means the adjacent bolt hardware is also under stress. Interior floor cracks cannot be adequately dried, prepped, or accessed for a reliable epoxy application. Replace the tank.
🚨 Red Flag 4 — Multiple Cracks or Crazing Pattern
Multiple cracks — even if each individual crack appears minor — indicate that the porcelain body has experienced significant cumulative stress. Repairing one crack in a tank with four other hairline fractures addresses a symptom, not the condition. As the repaired crack is sealed, any future stress concentrates at the next weakest point. Tanks with multiple cracks typically fail at a second location within 6 to 18 months of a single-crack repair. The only durable solution is replacement.
🚨 Red Flag 5 — Crack in a Toilet Over 20 Years Old
Pre-1994 toilets use 3.5 gallons per flush (GPF) or more — more than double the 1.28 GPF of current WaterSense-certified models. A household of two people using a 3.5 GPF toilet spends approximately $120 to $180 more per year on water than with a current-generation model.
Repairing a crack in a 25-year-old toilet and extending its life by 2 to 3 years costs the household $240 to $540 in excess water costs during that period — compared to $250 to $400 for a new toilet installed. The economics almost always favor replacement in this scenario.
Replace vs. Repair — The Decision Framework Most Guides Skip
Most DIY repair articles focus entirely on the repair process and treat replacement as a last resort mentioned in a single sentence. In practice, once you fully diagnose whether to repair a cracked toilet tank or replace it, replacement is the correct answer more often than repair — and the financial case is more nuanced than most homeowners realize. Here is the complete framework for making this decision correctly.
| Condition | Repair | Replace Tank | Replace Full Toilet |
|---|---|---|---|
| Hairline, above waterline, tank under 15 years old | ✅ Best option | — | — |
| Surface crack, not full-thickness, above waterline | ✅ Attempt repair | If repair fails | — |
| Full-thickness crack, above waterline, short | ⚠️ Risky — monitor closely | ✅ Recommended | If bowl is same age |
| Crack near bolt hole or flush valve seat | ❌ Do not repair | ✅ Best option | If toilet is 15+ years |
| Multiple cracks or crazing pattern | ❌ Do not repair | Consider if bowl is sound | ✅ Best option |
| Toilet over 20 years old, 3.5+ GPF model | ❌ Not cost-effective | ❌ Not cost-effective | ✅ Best option |
| Crack on tank floor or below interior waterline | ❌ Do not repair | ✅ If bowl is sound | ✅ If toilet is 10+ years |
The real cost comparison: A replacement toilet tank for a major-brand two-piece toilet (American Standard, Kohler, TOTO) costs $50 to $150 for the correct-model part — confirmed by matching the model number stamped inside the tank. A plumber installs a replacement tank in 45 to 90 minutes at $85 to $150 per hour, bringing total installed cost to $150 to $300.
A full toilet replacement — new toilet plus installation — runs $400 to $900 depending on toilet grade. DIY repair material cost runs $15 to $40 for two-part marine epoxy and supplies. The right answer is whichever path produces a reliable outcome at the lowest total cost over the next 5 years — not the lowest cost today.
When the Answer Flips — When to Skip Repair Entirely
If the toilet is a TOTO, Kohler, or American Standard model that is under 5 years old and under warranty, contact the manufacturer before attempting any repair. Applying unauthorized repair products to a cracked tank can void the warranty on the tank and sometimes the complete toilet.
TOTO offers a 1-year warranty on china; American Standard and Kohler offer similar coverage. A crack from a manufacturing defect — not impact — may qualify for a no-cost tank replacement under warranty. A five-minute phone call to the manufacturer’s support line before applying any epoxy can save the full $150–300 replacement cost.
Frequently Asked Questions — Repair a Cracked Toilet Tank
Can you repair a cracked toilet tank, or does it always need to be replaced?
The answer to whether you can repair a cracked toilet tank depends on crack type. Repair is viable when the crack is hairline or surface-depth, located above the waterline, shorter than 3 inches, and not near a bolt hole or flush valve.
These conditions describe roughly 30 to 40 percent of cracked tanks seen on service calls. The majority of cracked tanks homeowners attempt to repair are better candidates for tank or full toilet replacement based on crack location, depth, or toilet age. The diagnostic steps in this guide determine which situation you face before any materials are purchased.
What is the best epoxy for a cracked toilet tank?
Two-part marine epoxy rated for continuous water immersion and bond strength over 3,000 PSI is the correct product class for toilet tank crack repair. Products formulated for ceramic, porcelain, or vitreous china are the appropriate sub-category.
The key specification is water immersion rating — many general-purpose epoxies are water-resistant but not rated for continuous submersion, which is exactly the condition inside a toilet tank. Confirm the product label states “continuous water immersion” or “underwater application” before purchase.
How long does a toilet tank crack repair last?
A correctly executed epoxy repair on a hairline or shallow surface crack, above the waterline, with full surface prep and complete cure time, can last 3 to 7 years in normal residential use.
This assumes the crack was correctly classified, the surface was fully dried and degreased before application, and the epoxy reached full cure (24 hours) before water was restored. Repairs on cracks that were borderline in classification, or where cure time was shortened, typically last 3 to 18 months before reactivating.
Is a cracked toilet tank dangerous to use?
Using a toilet with a cracked tank carries real risk, even for hairline cracks. Vitreous china under hydrostatic pressure can fail along an existing crack line without warning — particularly during the fill cycle when pressure is highest.
A tank failure releases 1.6 to 3.5 gallons of water instantly onto the bathroom floor and continues flowing until the supply valve is closed. The secondary damage — water penetration to subfloor, ceiling below, and wall framing — can cost $500 to $3,000 to remediate. If a crack is actively leaking, do not continue using the toilet until the repair has been pressure-tested successfully or the tank has been replaced.
Can I use Flex Seal or similar spray products on a cracked toilet tank?
Spray sealants and rubberized coatings are not appropriate for toilet tank crack repair. These products are designed for exterior surface waterproofing — roofing, gutters, and similar applications — where they bond to rough surfaces without submersion.
Inside a toilet tank, the constant water cycling and chemical exposure from water treatment additives causes these coatings to soften, peel, and shed particulate matter into the water supply. They do not create a structural bond with vitreous china under any conditions. Use a two-part epoxy rated for porcelain and continuous water immersion.
How do I find a replacement tank for my toilet model?
The toilet model number is stamped inside the tank — lift the lid and look on the back wall of the tank interior, near the waterline. It will typically be a series of letters and numbers.
Take that model number to the manufacturer’s website or a plumbing supply house — not a big-box home improvement store, which stocks a limited range — to find the matching replacement tank. If the model is discontinued, the manufacturer’s parts line or a specialized toilet parts supplier can locate a compatible tank.
What causes a toilet tank to crack on its own without impact?
Spontaneous cracks — those that appear without visible impact damage — are caused by thermal stress or manufacturing micro-defects. Thermal stress builds when hot and cold water cycle repeatedly through the same porcelain structure.
Municipal water supplies in summer can run 10 to 15°F warmer than in winter, and this temperature cycling creates cumulative stress at any existing micro-void in the porcelain body. Tanks that are under 5 years old and crack without impact are often defective from the manufacturing process and may qualify for replacement under warranty.
Verdict — Three Situations, Three Clear Answers
If the crack is hairline, above the waterline, and under 3 inches long on a tank under 15 years old: Proceed with the 5-step repair in this guide. Follow the drying and cure time requirements exactly. Pressure-test before declaring complete. Monitor monthly for the first year.
If the crack is full-thickness, near hardware, below the waterline, or on a toilet over 20 years old: Skip repair and replace the tank or full toilet. The economics of attempting to repair a cracked toilet tank do not hold up when crack location makes success unlikely — and the cost of a bathroom flood from a failed repair far exceeds the cost of a new tank installed by a plumber at $150 to $300.
If the toilet is under 5 years old and cracked without obvious impact damage: Contact the manufacturer’s warranty line before touching the tank with any product. A manufacturing defect crack may qualify for a no-cost replacement under the original warranty. One phone call before opening an epoxy tube is worth making every time.
How to Seal a Crack in a Toilet Tank — What the Method Depends On
Sealing a crack in a toilet tank requires matching the sealing method to the crack depth, not just the crack size. A hairline crack that has not penetrated full-thickness through the porcelain wall responds well to low-viscosity epoxy applied by syringe. The capillary action of the crack channel draws the material in and creates a continuous bond across the fracture plane.
A surface crack wider than a hairline but not full-thickness requires the two-layer mesh method: epoxy base coat, embedded fiberglass mesh, epoxy top coat. This approach distributes future stress across 2 to 3 inches of reinforced area rather than concentrating it at the original crack tip.
The sealing method also depends on whether you are addressing the interior tank surface, the exterior, or both. For any crack that has penetrated even partially into the porcelain body, sealing both surfaces is the correct approach — one side alone leaves a water path through the partially penetrated porcelain.
Surface prep on the interior is more challenging because the tank hardware limits access. If the crack is on the interior wall directly behind the fill valve, the fill valve must be removed before prep and application can proceed correctly. This adds 15 minutes but is not optional. For more information on fill valve removal, see our guide at best toilet fill valves.
Best Epoxy for Cracked Toilet Tank — What Specifications Actually Matter
The market for porcelain and ceramic repair epoxy is crowded with products that differ significantly in their actual performance for toilet tank applications. The specifications that matter for this specific use case are: continuous water immersion rating, bond strength on non-porous glazed surfaces, cure time at room temperature, and potable water safety for interior tank applications. Not every product labeled “porcelain epoxy” meets all four criteria.
Two-part epoxy systems (resin plus hardener mixed at point of use) consistently outperform single-part systems for toilet tank repair. The chemical cure mechanism — polymerization triggered by mixing — is not affected by ambient humidity. Single-part moisture-cure epoxies react with atmospheric moisture, which creates a fundamental problem: the surface must be bone dry for adhesion, but the cure mechanism requires moisture. Two-part systems eliminate this contradiction entirely.
Bond strength on glazed porcelain after 400-grit surface abrasion should be confirmed by the manufacturer to exceed 2,500 PSI. For interior tank applications where the epoxy contacts the potable water supply, confirm that the product carries a potable water contact rating or NSF/ANSI 61 listing. If you are replacing a failed toilet rather than repairing a cracked toilet tank, see our complete review at best toilets to buy for current model recommendations across all categories.
Porcelain Toilet Tank Crack Repair — Understanding the Material Limitations
Vitreous china — the material used in virtually every residential toilet tank in the United States — is a dense, non-porous ceramic fired at 2,100°F to 2,300°F. Its properties that make it ideal for toilet tanks (hardness, non-porosity, chemical resistance, smooth glazed surface) are the same properties that make porcelain toilet tank crack repair challenging. Understanding this helps explain why this guide emphasizes diagnosis and surface prep over product selection.
The glaze layer is chemically inert and mechanically smooth — two characteristics that reduce epoxy adhesion compared to a rough, porous substrate. This is why surface abrasion before epoxy application is mandatory, not optional: it creates the mechanical interlocking surface that compensates for the chemical adhesion limitations of the glaze.
Porcelain also has zero tensile strength — it does not flex. When a repaired crack is subjected to the mechanical vibration of a filling tank, the interface between the epoxy and the porcelain is the stress concentration point. This is why the long-term success rate of porcelain crack repair is lower than most homeowners expect: the repair material (epoxy, which has meaningful flexibility) and the substrate (porcelain, which has none) respond differently to mechanical vibration, and the interface fatigues over time.
For tanks that are better candidates for replacement, explore two-piece toilet options and one-piece toilet options to find the right replacement for your bathroom configuration. Set a calendar reminder to perform the paper towel moisture test at 30 days, 90 days, and 6 months post-repair. Early detection of a failing repair allows you to plan tank replacement on your schedule rather than responding to a bathroom flood at an inconvenient time.