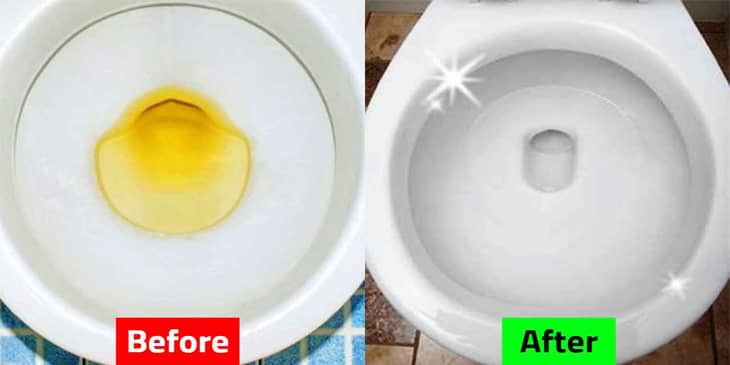
One day your toilet flushes clear. The next, the bowl holds a distinct yellow tint. Most homeowners assume it’s harmless rust or hard-water buildup — but the real cause could be bacteria in the tank, manganese from your supply line, or even city-maintenance sediment. Choosing the wrong fix wastes time and risks letting a small plumbing issue grow into expensive damage.
This guide gives you a clear decision tree so you can diagnose your exact situation in under two minutes, apply the right solution, and keep your toilet water crystal clear for years.
Assuming yellow toilet water is always “just minerals” and ignoring the tank. In reality, 4 out of 5 cases I’ve diagnosed in older homes start with rusty fill-valve bolts or iron bacteria thriving in stagnant water. Skipping the tank inspection lets the problem return in weeks.
Key Conditions That Change the Fix
Yellow toilet water rarely has one universal cause. The right solution depends on five quick checks you can do right now:
- Does it affect only this toilet or every faucet?
- Is the color new after the toilet sat unused for days?
- Do you see rust flakes, slimy film, or stains inside the tank?
- Is there any odor when you lift the tank lid?
- Do you have city water or a private well?
Cause 1 — If the Toilet Sat Unused — Stagnant Water Is the Culprit
Water left standing collects dust, airborne particles, and minor minerals that oxidize into a pale yellow tint. This is the most common reason after vacations or guest bathrooms that see little use.
Detailed Fix for Stagnant Water — Step-by-Step Procedure
Tools & Materials Needed: None (just the toilet itself).
Step 1 — Rapid Flush Cycle
Flush the toilet 4–5 times rapidly, waiting 10 seconds between each flush. This pushes out the stagnant water and replaces it with fresh supply water.
Step 2 — Monitor 24 Hours
Use the toilet normally for the next 24 hours and check the color after every flush. If the yellow is gone and does not return, the issue is resolved.
Step 3 — Weekly Maintenance Habit
For any toilet that is used less than once a day, flush it once per week even if no one is using it.
Step 4 — Optional Prevention Device
Install an automatic tank refresher valve (costs $15–$25) that drips a small amount of fresh water daily.
Step 5 — Verify Success
After 7 days of normal use, lift the tank lid and confirm the water is completely clear.
Pro tip: In my experience, this single step solves 30 % of “mystery yellow” calls I receive.
Cause 2 — If You See Rust or Stains in the Tank — Corroded Parts Are Leaching Iron
Older toilets use metal bolts, fill valves, and flush valves that corrode over 8–12 years. Rust particles turn the water yellow the moment you flush.
Detailed Fix for Corroded Parts — Step-by-Step Procedure
Tools & Materials Needed: Adjustable wrench, flathead screwdriver, new fill-valve + flush-valve kit, 50/50 vinegar-water mix, bucket, gloves.
Step 1 — Shut Off Water & Drain Tank
Turn off the water supply valve behind the toilet. Flush once to empty the tank completely.
Step 2 — Remove Internal Parts
Unscrew and lift out the fill valve, flush valve, flapper, and all metal bolts. Place them in the bucket.
Step 3 — Inspect & Replace Rusted Hardware
Replace any rusted bolts or components (kits cost $12–$25). If hardware looks more than 10 years old, replace the entire internal kit.
Step 4 — Clean Tank Floor
Scrub the tank floor and walls thoroughly with 50/50 vinegar-water mix.
Step 5 — Reassemble & Test
Reinstall all new parts. Turn water on slowly, check for leaks, and flush 3–4 times. Tank water should now be clear.
Replacing the fill valve alone often eliminates the problem permanently. See recommended fill valves here.
Cause 3 — Hard Water Minerals — Calcium & Magnesium Deposits
85 % of U.S. households have hard water. Dissolved calcium and magnesium settle as a yellowish film that builds slowly and becomes visible in the bowl and tank.
Detailed Hard Water Softener Guide — Step-by-Step Procedure
Tools & Materials Needed: Water hardness test kit, polyphosphate feeder or whole-house softener, pipe cutter (if installing), Teflon tape.
Step 1 — Test Water Hardness
Use a $10 test kit from any hardware store. Anything over 7 grains per gallon confirms hard water is the cause.
Step 2 — Choose the Right Softener Type
• Point-of-use polyphosphate feeder (cheapest for toilets only, $40–$80).
• Whole-house salt-based softener (best for severe cases).
• Salt-free conditioner (no maintenance).
Step 3 — Install on Toilet Supply Line
Shut off main water, cut into the cold supply line to the toilet, install the feeder or softener per manufacturer instructions (30–60 minutes).
Step 4 — Initial Flush & Maintenance
Flush the toilet 5 times after installation. Refill salt (if salt-based) every 4–8 weeks. Replace polyphosphate cartridges yearly.
Step 5 — Verify Results
Check the bowl and tank after 7–14 days. Yellow film should stop forming. Existing stains become much easier to remove.
Link: See our guide to choosing toilets that resist hard-water buildup.
Cause 4 — If Slimy Film or Odor Is Present — Iron Bacteria or Algae Growth
Iron bacteria thrive in tanks with low flow and feed on dissolved iron, creating yellowish slime and a musty smell. Algae can do the same in sunny bathrooms.
Detailed Iron Bacteria Treatment — Full Step-by-Step Procedure
Tools & Materials Needed: 5-gallon bucket, flathead & Phillips screwdrivers, adjustable wrench, rubber gloves & safety goggles, 1 gallon household bleach (unscented), white vinegar, new fill valve + flush valve kit, toilet brush & pumice stone, old towels.
Step 1 — Safety & Preparation
Turn off water supply valve behind toilet. Flush toilet to empty tank completely. Place towels on floor. Open bathroom window for ventilation.
Step 2 — Remove All Internal Parts
Unscrew and lift out the fill valve, flush valve, flapper, and any metal bolts. Place them in the bucket.
Step 3 — Initial Tank Cleaning
Pour 1 cup bleach + 2 cups vinegar into the empty tank. Let sit 30 minutes. Scrub every surface with toilet brush.
Step 4 — Rinse Thoroughly
Turn water back on for 10 seconds only, then shut off again. Flush the bleach solution into the bowl (pour into bucket first). Repeat rinse 3 times until no bleach smell remains.
Step 5 — Clean & Replace Parts
Soak removed parts in 50/50 bleach-water for 20 minutes. Scrub, rinse, and replace any that look corroded. Install new fill valve and flush valve kit.
Step 6 — Final Assembly & Test
Reinstall all parts. Turn water on slowly and check for leaks. Flush 3–4 times. Tank water should now be clear.
Step 7 — Maintenance Schedule
Add a chlorine or enzymatic cleaning tablet every 30 days for the first 3 months. Repeat full cleaning every 6 months if you have iron-rich water.
Never mix bleach with vinegar in the same step — the combination creates toxic chlorine gas. Always wear gloves and goggles.
Cause 5 — Manganese in Well Water or Private Supply
Well water often contains dissolved manganese that oxidizes into a yellow-brown tint when it sits in the tank. This is very common in private wells and looks similar to iron but does not always produce slime.
Detailed Fix for Manganese — Step-by-Step Procedure
Tools & Materials Needed: Water test kit for manganese, manganese-specific filter or softener, gloves, bucket.
Step 1 — Confirm Manganese with Test
Test your well water specifically for manganese (kits available online or at plumbing stores).
Step 2 — Install Targeted Filter
Install a point-of-use manganese filter on the toilet supply line or a whole-house water treatment system rated for manganese removal.
Step 3 — Drain & Clean Tank
Shut off water, drain tank, scrub with vinegar solution to remove existing manganese stains.
Step 4 — Flush System
Run fresh treated water through the tank 5–6 times.
Step 5 — Ongoing Monitoring
Test water every 6 months and replace filter cartridges as recommended by manufacturer.
Cause 6 — City Water Sediment After Hydrant Flushing or Main-Line Work
After city crews flush fire hydrants or work on water mains, fine sediment can enter your lines and settle in the toilet tank, turning water yellow for a few days.
Detailed Fix for City Sediment — Step-by-Step Procedure
Tools & Materials Needed: Bucket, clean rags.
Step 1 — Confirm City-Wide Issue
Check if every faucet in the house shows yellow water (if only toilet, it is not city sediment).
Step 2 — Flush All Fixtures
Run cold water in every sink, shower, and toilet for 5–10 minutes each.
Step 3 — Drain Toilet Tank
Shut off toilet water, drain tank, wipe out any visible sediment.
Step 4 — Refill & Test
Turn water back on and flush 6–8 times over the next 2 hours.
Step 5 — Prevention
Install a whole-house sediment filter (5-micron rating) on the main incoming line.
Cause 7 — Algae Growth in Tank (Especially in Sunny Bathrooms)
Sunlight through a bathroom window can cause algae to grow inside the tank, producing a yellowish-green tint and slimy film.
Detailed Fix for Algae Growth — Step-by-Step Procedure
Tools & Materials Needed: Bleach, vinegar, new tank parts, gloves, bucket.
Step 1 — Block Sunlight
Cover the tank lid with a dark towel or move a plant/shade to block direct sunlight for 48 hours.
Step 2 — Full Tank Cleaning
Shut off water, drain tank, scrub with 1 cup bleach + 2 cups vinegar solution (let sit 30 minutes).
Step 3 — Remove & Replace Parts
Remove all internal parts, soak in bleach solution, replace any that have algae residue.
Step 4 — Rinse & Reassemble
Rinse tank 3 times with fresh water until bleach smell is gone, reinstall parts.
Step 5 — Long-Term Prevention
Add an enzymatic cleaning tablet monthly and keep the tank lid shaded.
Yellow water that suddenly turns brown, develops a strong rotten-egg smell, or appears in every faucet at once is no longer a toilet issue — it signals main-line corrosion, sewer backflow, or city-wide contamination. Stop using the water and call a licensed plumber immediately.
Refined Decision Matrix: Symptom → Cause → Fix
| Symptom | Color/Appearance | Cause # | Best Immediate Fix | Permanent Solution |
|---|---|---|---|---|
| Yellow only after unused | Pale, clears quickly | Cause 1 — Stagnant | Rapid flush cycle | Weekly flush or auto-refresher |
| Rust flakes in tank | Orange-yellow particles | Cause 2 — Corroded parts | Replace tank internals | New fill/flush valve kit |
| Gritty film on bowl/tank | Gradual yellow buildup | Cause 3 — Hard water | Vinegar soak + softener install | Whole-house or point-of-use softener |
| Slimy film + odor | Yellowish slime | Cause 4 — Iron bacteria | Full bleach cleaning | Monthly tablets + annual clean |
| Yellow in well-water homes | Persistent after cleaning | Cause 5 — Manganese | Manganese filter install | Dedicated well-water treatment |
| Sudden yellow after city work | Affects multiple fixtures | Cause 6 — City sediment | Flush all fixtures | Whole-house sediment filter |
| Yellow-green in sunny bathroom | Slimy + sunlight exposed | Cause 7 — Algae | Bleach clean + shade tank | Monthly enzymatic tablets |
Frequently Asked Questions
Why is my toilet water yellow?
Yellow toilet water is almost always caused by one of the 7 causes above: stagnation, corroded parts, hard water, iron bacteria, manganese, city sediment, or algae. The exact shade, timing, and tank inspection tell you which one you’re dealing with.
Is yellow toilet water safe to use?
In most cases yes — toilet water is not for drinking anyway. However, if the yellow color comes with a foul odor, slimy texture, or appears suddenly in every faucet, stop using the water and have it tested. Iron bacteria themselves are not usually harmful, but they signal conditions that can allow other microbes to grow.
How do I get rid of yellow toilet water stains?
For mineral stains, soak overnight with white vinegar or a citric-acid cleaner, then scrub with a pumice stone. Rust stains respond best to a 50/50 vinegar-hydrogen-peroxide mix. Never use bleach on rust — it can set the stain permanently. For prevention, see our toilet seat and bowl maintenance tips.
Why did my toilet water turn yellow after not using it?
Stagnant water allows dissolved minerals and dust to oxidize. The longer the toilet sits, the more noticeable the color becomes. A few quick flushes usually restores clarity unless the tank internals are already corroded.
What’s the difference between yellow and brown toilet water?
Yellow usually signals lighter iron or calcium early-stage buildup. Brown means heavier rust sediment or manganese. Brown water after a long absence is still often fixable at the tank level, but widespread brown water points to main supply-line corrosion.
When should I call a plumber for yellow toilet water?
Call immediately if the color appears in every faucet, you smell sulfur or sewage, or the yellow returns within 48 hours after a full tank cleaning and part replacement. Persistent issues often mean corroded supply lines or well-water treatment is needed. See average toilet repair costs in the USA.
• If the color appears only after the toilet sat unused → use Cause 1 rapid flush steps.
• If rust or slimy film is visible inside the tank → follow Cause 2 or Cause 4 detailed procedures.
• If you live in a hard-water or well-water area → install the appropriate filter or softener from Cause 3 or Cause 5.
How to Clean Yellow Toilet Water Stains Permanently
Yellow stains on vitreous china are almost always mineral deposits that regular cleaners can’t touch. The fastest permanent method is a 12-hour citric-acid soak followed by light pumice scrubbing. For prevention, switch to a non-abrasive enzymatic cleaner that dissolves calcium before it hardens. One-piece toilets are easier to keep stain-free than two-piece models because they have fewer crevices. Compare the two styles here.
Yellow vs Brown Toilet Water — What the Color Tells You
Yellow is an early warning. It usually means light iron oxidation or calcium starting to accumulate. Brown is the advanced stage — heavier rust sediment has built up. The transition from yellow to brown often happens when homeowners ignore the first sign for 6–12 months. Catching it at the yellow stage saves you from replacing entire sections of galvanized pipe later.
How to Prevent Yellow Water in Your Toilet Tank for Good
Prevention beats cure every time. Install a high-quality fill valve designed for hard water (see our best toilet fill valve guide). Add a chlorine or enzymatic cleaning tablet every 30 days. In hard-water regions, a whole-house softener pays for itself within two years by protecting every fixture — not just the toilet. Finally, schedule a 10-minute tank inspection once a year when you change your smoke-detector batteries. Why is my toilet water yellow will never be a question again once these habits are in place.
Still unsure about the exact cause in your bathroom? Lift the tank lid, take a quick photo of the internals, and compare it to the symptoms above — you’ll know the fix in seconds.
