When your toilet is old or worn out, you need to replace it. Although replacing the entire toilet can be expensive, fortunately for you, separate toilet tanks can be purchased individually. In addition, it is easy enough to install on your own without acquiring the services of a Plumber!
But how to replace a toilet tank? The process is easy as you have to unplug a few connections to remove the old tank and then install a new one.
Whether you are thinking about how to repair a cracked toilet tank or replace a cracked toilet seat, or simply want to get a new one, then follow this extensive guideline here.
How to Change the Toilet Tank
Although installing a toilet tank, in general, might be easy, even the simplest of tasks can seem daunting if you don’t know what to do. So, let’s check out the step-by-step guideline.
Step 1: Unplug the Water Connection from the Toilet Tank
The first step is to know how to clean the toilet tank of any water. To prevent water from entering the reservoir, turn the handle counter clockwise, for which you need to look for a metal valve that links to the toilet tank on the wall. Once the water supply has been cut, you can start progressing towards the actual replacement.
Step 2: Flush the Toilet’s Water Supply
The next step involves draining the cistern of any water. You should push down the toilet handle until all the water is drained. However, if any water keeps returning after flushing is stopped, that means the water supply is not completely off.
Therefore, make sure to secure the water valve tightly to solve the issue. From experience, water drippings are quite common, so you should always keep a towel handy to mop away any spillage.
You may also like this article: How to Fix a Loose Toilet Handle Without Professional Help
Step 3: Unplug and Remove the Supply Hose from the Toilet Tank
The next step involves looking for the tube, which is usually plastic or metal, that links the supply hose to the toilet tank at the bottom. Before attempting to release its coupling with a wrench, it is generally best to do it with your bare hands first.
In general, using your hands to loosen it does the work; however, a particularly stubborn knob might need the use of a wrench or pliers for a stronger hold. Moreover, make sure to keep a mop and bucket at hand’s length to gather any residual spills from the loose hose.
Step 4: The Screws on the Toilet Tank Should Be Unhooked
Find the bottom of your tank where the ends of the bolts are located, and use locking pliers to grab one of the nuts. Use a screwdriver next to twist the bolts anticlockwise.
As you crank the bolts, the nuts below them will come off, allowing you to drag the nuts up through the tank. For the remaining nuts in the tank, follow the same procedure.
Just a pointer, if the screws securing the tank in position are rusted, you can see through them by inserting a hacksaw blade into the gap between the toilet tank and the tank’s exterior bowl. Be cautious when using the blade to avoid cutting oneself by accident.
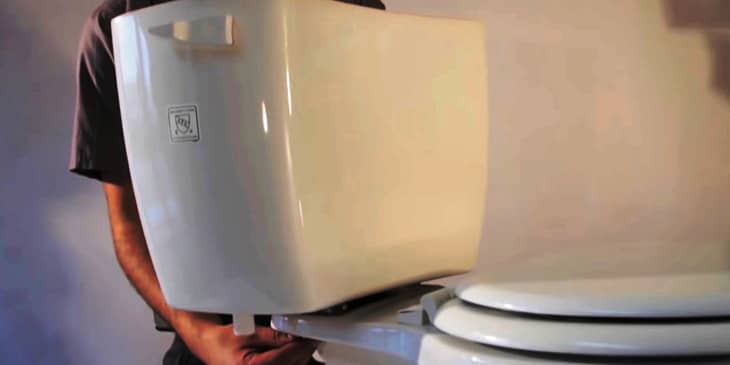
Step 5: From the Toilet Bowl, Lift and Remove the Tank
Slowly lift the tank away from the bottom. To avoid damaging the bowl or dropping the flush levers within the tank, be sure to lift the bowl off the floor straight up and carefully.
So as not to damage your floors, place the tank aside on a towel for the time being.
Step 6: Choose a Tank That Is the Same Size As the Gasket on the Toilet Bowl
The gasket is the major passageway through which water enters the bowl via the tank. Use a tape measure to gauge the dimensions of the gasket on the toilet bowl to get a tank with the same-sized hole.
To keep your toilet looking coherent, ensure the tank color and bowl match. We don’t want an unmatched tank and bowl, do we!?
Place the gasket in the new toilet tank’s lowest section. If you’re having trouble identifying it, search the cistern for anelastic ring. Spread a towel or a rag and place it on the side to reach the edge of the tank. To achieve a solid seal over the huge hole, try pushing the gasket all the way to the bottom.
Step 7: Slide Rubber Washers on All Bolts of the Toilet Tank
It will come with all the screws and washers needed to mount your tank on your bowl. Push one rubber washer on every bolt using the ones that came with the tank. To create a seal that stops leaks, make sure the washer is placed firmly against the tip of the screw.
Step 8: With the Openings Aligned, Place the Tank Atop the Toilet Bowl
With both hands, cautiously raise the tank, and place it at the backside of the toilet bowl. Place the tank in such a way so that the gasket meets the wide bowl opening at the back.
Next, make sure the holes for the bolts are aligned so that you can insert the screws without difficulty. To stop the tank from slipping or falling, hold it firmly in place while you attach it.
Step 9: To Secure and Level the Tank, Tighten a Nut on to Each Bolt
To prevent breaking or to damage the nuts from underneath the tank, carefully guide a washer onto each. Each bolt should be hand-tight after being fitted with the supplied nuts in the proper clockwise direction.
The nuts should be tightened with a wrench or a pair of locking pliers until they are impossible to spin anymore. To ensure the tank is not tilting or leaning, use a level to inspect it.
That’s all you need! Now that the tank is installed, clip the refill hose to the top of the flush valve and securely screw the supply hose onto the bottom of the tank before turning on the water supply.
Conclusion
Learning how to replace a toilet tank at first might seem like a daunting task, but with some simple and basic steps and guidelines, it will be a piece of cake! Just 9 easy steps. Lucky for you, you have this article to help you out through each of them!