Most homeowners clean their bathroom weekly yet still battle lingering odors, visible streaks, recurring mold, and that “still dirty” feeling. In my professional experience installing and servicing toilets for over 20 years, the problem is rarely lack of effort — it’s repeating the same bathroom cleaning mistakes that spread bacteria, damage surfaces, or simply move dirt around instead of removing it.
This guide reveals the most common bathroom cleaning mistakes (and several that surprise even experienced homeowners) and shows you the correct professional techniques that deliver truly sanitary results. You’ll learn deep grout cleaning methods that actually work, safe eco-friendly cleaners, and exactly how to properly clean a bathroom so it stays clean for weeks.
Using one single sponge or cloth for the entire room. This spreads E. coli and bacteria from the toilet straight to your sink, mirror, and shower. Always use color-coded microfiber cloths — one color per zone.
Tools and Materials You Actually Need
Skip the overpriced gadgets. These are the exact tools professional cleaners rely on for safe, effective results:
- Microfiber cloths (at least 6, color-coded) — never paper towels
- Toilet brush with silicone bristles — replace every 6 months
- Grout brush or old toothbrush
- Gloves and eye protection
- EPA-approved disinfectant or natural alternatives
- Baking soda, distilled white vinegar, hydrogen peroxide for eco-friendly cleaning
- Pumice stone (for toilet rings only — never on colored porcelain)
Keep these tools dedicated to the bathroom only. Many people also forget to dust or vacuum first or clean in the wrong order (bottom-to-top), which simply moves dirt onto freshly cleaned surfaces.
Step-by-Step: How to Properly Clean Your Bathroom
Remove everything from countertops, shower shelves, and the floor. Take out rugs, bath mats, and shower curtains. Run the exhaust fan on high or open a window. This prevents cleaning around clutter — one of the biggest mistakes that leaves hidden dirt and forces you to re-clean later.
Use a microfiber duster or vacuum with brush attachment on high areas, light fixtures, baseboards, vents, and especially behind and under the toilet. Dust always falls downward, so this step must come before any wet cleaning. Skipping dust removal is why many bathrooms still look dusty after you finish.
Start with mirrors and glass, then light fixtures and upper cabinets, sink and counters, shower walls and glass doors, bathtub, toilet (tank, lid, bowl, base, and behind), and finish with the floor. Cleaning bottom-to-top or out of order simply moves dirt onto freshly cleaned surfaces.
Spray your chosen cleaner or disinfectant on all surfaces and walk away. Disinfectants need a full 5–10 minutes of dwell time to kill bacteria and break down soap scum. Rushing this step or wiping immediately is one of the most common bathroom cleaning mistakes and leaves germs behind.
Scrub grout lines and stubborn spots gently with the right brush. Wipe all surfaces with clean, color-coded microfiber cloths (never reuse the same cloth). Rinse the shower and tub completely with clean water to remove all residue — leftover cleaner attracts more dirt.
Wipe every surface dry with a fresh microfiber cloth — especially the toilet base, sink edges, shower floor, and around faucets. Run the exhaust fan for at least 20–30 minutes after cleaning. Leaving any moisture behind is the fastest way to grow new mold.
Deep Grout Cleaning Techniques
Grout is porous and traps mold, soap scum, and dirt that regular cleaning can’t reach. Using bleach on grout, straight vinegar, wire brushes, or aggressive scrubbing are some of the biggest grout cleaning mistakes — they either fail to kill deep mold or actually damage and erode the grout over time.
Mix ½ cup baking soda with ¼ cup 3% hydrogen peroxide (and 1 tsp castile soap if desired) into a thick paste. Wearing gloves, apply generously to grout lines using a soft grout brush or old toothbrush. Let it sit 15–30 minutes (up to 1 hour for heavy black mold). Scrub gently in small circles — never use steel wool or abrasive pads. Rinse thoroughly with clean water, then wipe dry immediately. Repeat every 4–6 weeks for maintenance.
Mix oxygen bleach (sodium percarbonate) with warm water according to package directions. Apply to grout, let dwell 20–40 minutes, scrub lightly, and rinse well. This is gentler than chlorine bleach and works especially well on white grout.
After deep cleaning, seal grout lines every 12–24 months with a quality penetrating sealer. Apply sealer with a small brush or applicator, let it penetrate for the recommended time, then wipe off excess. Sealed grout resists stains far better and makes future cleaning much easier. Over-wetting grout or using dirty mop water pushes stains deeper — always use minimal water and change your solution frequently.
Eco-Friendly Bathroom Cleaning Options
You don’t need harsh chemicals to get professional results. These natural, non-toxic options are safer for your family, plumbing, and the environment while still cutting through soap scum and killing bacteria. Here are the exact recipes and application methods I recommend:
Mix 2 cups warm water + 1 tablespoon baking soda + 2 tablespoons liquid castile soap + 20–30 drops tea tree or lemon essential oil in a spray bottle. Shake well before each use. Spray liberally, let dwell 5–10 minutes, then wipe with a microfiber cloth. This formula disinfects naturally and leaves no sticky residue.
Sprinkle ¼ cup baking soda directly into the bowl. Pour 1 cup distilled white vinegar slowly so it fizzes. Let it sit 10–15 minutes (longer for heavy stains). Scrub with your toilet brush, then flush. For extra power on rings, add 2 tablespoons hydrogen peroxide. This method cleans without corroding rubber parts.
Mix equal parts distilled white vinegar and water (1:1 ratio) in a spray bottle. Spray lightly, then immediately wipe with a dry microfiber cloth using straight vertical or horizontal strokes — never circles. This leaves mirrors and shower glass crystal clear with zero streaks.
Mix 1 cup water + 1 cup white vinegar + 10 drops tea tree oil. After every shower, lightly spray the floor and lower walls, let it sit 2–3 minutes, then squeegee or wipe dry. This prevents soap scum and mold buildup between deep cleanings.
These recipes cost pennies per use and eliminate the risk of mixing dangerous chemicals. Overusing commercial disinfectants or using the wrong products on sensitive surfaces is another common bathroom cleaning mistake — natural options often perform better with less residue.
Red Flags — Stop and Call a Plumber
What Most Cleaning Guides Miss About Bathroom Maintenance
Generic advice stops at surface wiping. Real long-term cleanliness comes from fixing the habits that cause buildup in the first place — not dusting or vacuuming first, cleaning out of order, leaving surfaces wet, ignoring high-touch areas, or using abrasive tools that scratch fixtures.
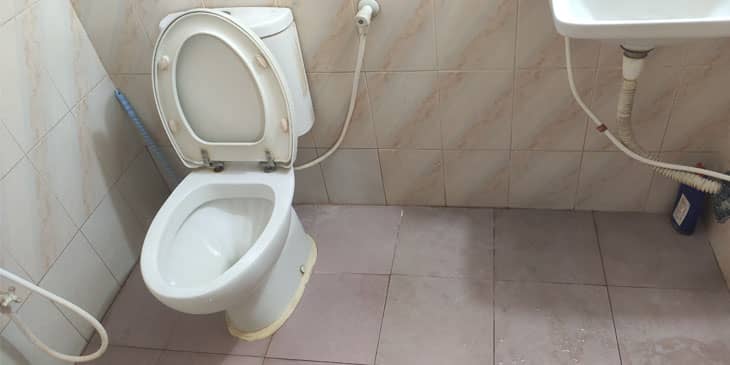
Skip all DIY cleaning and call a professional immediately if mold returns in under a week or water pools around the toilet base. These are signs of bigger plumbing issues that surface cleaning cannot fix.
Frequently Asked Questions
What are the most common bathroom cleaning mistakes?
The most common bathroom cleaning mistakes include using the same cloth on every surface (spreading bacteria), not letting cleaners dwell long enough, cleaning bottom-to-top instead of top-to-bottom, forgetting to dust or vacuum first, mixing incompatible products, skipping high-touch areas, using abrasive tools that scratch fixtures, and over-wetting grout. These errors move dirt around, create toxic fumes, or leave hidden buildup that causes recurring mold and odors. Fixing the order, tools, and dwell time usually solves the “still dirty” problem immediately.
How often should you clean your bathroom?
A quick daily wipe of high-touch areas plus a full deep clean once per week keeps most bathrooms sanitary. Busy households or those with pets may need twice-weekly cleaning. Consistent habits prevent buildup that turns weekly cleaning into an all-day project. Proper frequency also reduces the need for harsh chemicals.
Why is my bathroom still dirty after cleaning?
The usual culprits are cross-contamination from one cloth, skipping the dust-first step, not letting solutions dwell, failing to dry surfaces afterward, or forgetting high-touch areas. Moisture and residue left behind allow mold and bacteria to return quickly. Cleaning in the correct top-to-bottom order and ventilating properly fixes this issue in most homes.
What is the right way to clean bathroom grout?
Make a paste of equal parts baking soda and hydrogen peroxide, apply to grout lines, let sit 15–30 minutes (or longer for heavy mold), then scrub gently with a grout brush. Rinse thoroughly and wipe dry. Avoid bleach, straight vinegar, or abrasive tools — they don’t penetrate porous grout and can damage or erode it. Weekly maintenance with a diluted vinegar spray prevents black mold from returning.
Should you use bleach to clean your toilet?
Bleach works in the bowl for disinfection but avoid it in the tank or on colored fixtures — it corrodes rubber seals and can void warranties. Use baking soda and vinegar or a non-bleach cleaner instead. Proper technique keeps your toilet sanitary without damaging internal parts.
How do you avoid streaks when cleaning bathroom mirrors?
Spray with a 50/50 vinegar-water mix, then immediately wipe with a dry microfiber cloth using straight vertical or horizontal strokes. Never use paper towels or circular motions. Clean mirrors before the rest of the bathroom so dust doesn’t settle on wet glass.
Verdict / Summary Box
If your bathroom still looks or smells dirty after cleaning → you’re likely repeating several of the most common mistakes above (wrong order, no dwell time, cross-contamination, or skipping high-touch areas).
If mold returns quickly → check for plumbing leaks rather than just scrubbing harder.
If you want a bathroom that stays clean longer → follow top-to-bottom order, use proper dwell time, ventilate thoroughly, clean grout correctly, and switch to eco-friendly methods. Professional maintenance beats endless battles with buildup.
When these issues persist, professional help prevents small cleaning problems from becoming expensive plumbing repairs. See our guide on toilet installation costs if replacement becomes necessary.
Common Bathroom Cleaning Mistakes to Avoid
The mistakes outlined in this article are the exact ones repeated in homes across the country. The good news? They’re all easy to fix once you know the right sequence and tools. Stop wasting time on methods that don’t work and start using a system that keeps your bathroom truly clean.
Upgrading to an easy-clean toilet seat can also reduce daily maintenance effort.
How to Properly Clean a Bathroom
Proper bathroom cleaning isn’t about buying more products — it’s about using the right order, giving solutions time to work, drying surfaces thoroughly, and cleaning high-touch areas. Top-to-bottom cleaning combined with dedicated tools and proper ventilation eliminates 90% of recurring dirt and odor problems. Follow the step-by-step process above and your bathroom will stay fresher between cleanings while protecting your toilet’s internal components.
Common Toilet Cleaning Mistakes Explained
Toilet cleaning mistakes like using in-tank tablets, storing a wet brush, cleaning only the bowl (and ignoring the base and behind), or using abrasive tools create more problems than they solve. The entire fixture needs attention. Proper technique not only makes the toilet look better — it prevents costly repairs and keeps your entire bathroom healthier. For more on performance, check our guide to the best flushing toilets.
Bathroom cleaning mistakes are easy to fix once you know what to look for. Follow these guidelines, use the deep grout and eco-friendly methods above, and your toilet and shower will stay cleaner with far less effort. Questions about specific fixtures or persistent problems? Drop them in the comments — happy to help with tailored advice.