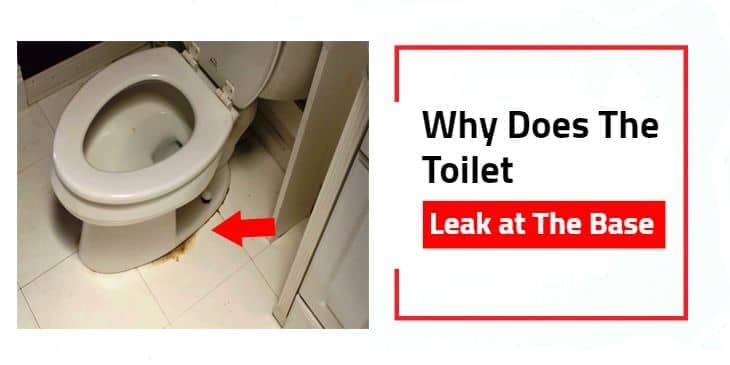
Water pooling at the base of a toilet is one of the most misdiagnosed plumbing problems a homeowner encounters. Most people assume the wax ring has failed and jump straight to replacing it — only to find the leak returns within days.
The wax ring is responsible for fewer than half the base leak calls a licensed plumber responds to. The real cause is often something else entirely, and replacing a wax ring on a toilet with a cracked flange or loose tee bolts is money and time wasted.
This guide identifies the five actual causes of a toilet leaking at the base, shows you how to diagnose which one you have before touching a wrench, and walks you through the correct fix for each. It also tells you exactly when a repair crosses from DIY territory into licensed plumber work — because getting that distinction wrong turns a $30 repair into a $2,000 subfloor replacement.
📋 Scope of This Guide
Who this is for: Homeowners comfortable removing a toilet, handling basic hand tools, and working in a confined bathroom space. Assumes no prior plumbing license but does assume you can shut off a water supply valve and disconnect a braided supply line.
What this guide covers: Diagnosis of base leaks, wax ring replacement, tee bolt replacement, supply line inspection, and initial flange assessment.
What this guide does NOT cover: Cutting into the subfloor, replacing a cast iron drain stack, cracked porcelain toilet replacement, or drain line obstruction clearing.
When to hire instead: If the floor feels soft or spongy around the toilet, if the flange is cracked below floor level, or if the toilet continues leaking after a correct wax ring installation — stop and call a licensed plumber.
⚠️ The Most Common Mistake — And It Costs Hundreds
The single most frequent mistake I see: homeowners caulk around the entire toilet base to stop water from appearing on the floor. This traps the leak inside — water continues seeping under the toilet, saturating the subfloor and encouraging mold growth where no one can see it. By the time the floor tiles start lifting or the subfloor feels spongy, the damage bill runs $800–$2,500 or more. Caulk is a cosmetic finish, not a plumbing repair. Find the source. Fix the source.
How to Diagnose Where the Leak Is Actually Coming From
Before you remove the toilet, spend five minutes on a dry-test diagnosis. The timing and location of the water tells you almost everything you need to know. Skipping this step is what causes homeowners to replace wax rings on toilets that have cracked porcelain — the wrong fix for the wrong problem.
Step 1 — Dry the area completely. Use towels and let the floor sit dry for 10 minutes. Place sheets of dry toilet paper around the full perimeter of the toilet base and a separate sheet directly behind the toilet near the supply line connection.
Step 2 — Observe the timing. Flush the toilet and watch where moisture appears first and how fast. This single observation narrows the cause significantly:
| Timing of Water Appearance | Most Likely Cause |
|---|---|
| Water appears only during or immediately after flush | Wax ring failure or loose tee bolts |
| Water present even between flushes | Supply line drip, shutoff valve weep, or tank condensation |
| Water appears at base but paper behind toilet is wet first | Supply line or shutoff valve tracking down to floor |
| Water appears slowly over several flushes, slightly different location each time | Cracked porcelain at base or cracked flange |
| Toilet rocks when you apply light lateral pressure | Loose or corroded tee bolts — wax ring distortion secondary |
Step 3 — Check the supply line independently. Run your finger along the full length of the braided supply line from the shutoff valve at the wall to the bottom of the tank. If any section feels damp or you find mineral deposits on the fittings, you may have found your leak without removing the toilet at all.
The 5 Causes of a Toilet Leaking at the Base
Every toilet base leak traces back to one of these five sources. Each has a distinct repair path. Confusing one for another is how simple jobs become expensive callbacks.
Cause 1 — Failed Wax Ring Seal
The wax ring is a soft, compressible seal that sits between the bottom of the toilet horn and the floor flange. When a toilet is properly set, the weight of the fixture compresses the wax into a watertight gasket. Most quality wax rings last 20–30 years under stable conditions — but that stability is the key variable.
Wax rings fail for three reasons: the toilet has been rocking on loose tee bolts (which shears the wax over dozens of flush cycles), the flange sits too low relative to the finished floor (which means insufficient compression from day one), or the original installation used a single thin ring on a floor with a higher-than-standard tile stack.
How to confirm: Water appears within 30 seconds of flushing, consistently at the same front or side position of the toilet base. No moisture present between flushes. The toilet may have slight movement when you apply side pressure.
Cause 2 — Loose or Corroded Tee Bolts
Tee bolts (also called closet bolts or floor bolts) anchor the toilet horn over the flange and hold the wax ring in compression. In a functioning installation, these bolts are tight and the toilet does not move. When the bolts corrode, strip, or loosen over years of use, the toilet develops subtle rocking motion that most users never notice — but which destroys the wax seal one flush at a time.
Corroded tee bolts are common in bathrooms where the base was caulked and moisture was allowed to sit undetected for years. The bolt shanks rust through at floor level, and no amount of nut-tightening from above will secure a bolt whose base has corroded away inside the flange slot.
How to confirm: Toilet moves laterally when you push it from the side. Flange bolt caps are discolored or corroded. Attempting to tighten the nuts causes the bolts to spin freely rather than snug down.
Cause 3 — Cracked or Damaged Toilet Flange
The floor flange is the fitting that connects the toilet drain to the sewer pipe below the floor. In homes built before 1975, flanges are typically cast iron. In homes built or renovated after that, they are PVC or ABS. Both materials fail — cast iron corrodes and cracks; PVC cracks from overtightened bolts or from a toilet being rocked repeatedly over a low-profile flange.
A cracked flange is the most dangerous base leak cause because no wax ring — regardless of thickness or quality — can seal against a flange that cannot hold its tee bolt slots intact. Replacing the wax ring on a broken flange and setting the toilet back down produces a temporary seal that fails within weeks.
How to confirm: Visible when toilet is removed. Look for cracks radiating from tee bolt slots, sections of the flange ring broken away, or a flange that sits below floor level by more than ¼ inch. Cast iron flanges with rust-through at the bolt slots require full flange replacement — not a repair collar.
Cause 4 — Supply Line Leak Tracking to the Base
A leaking supply line or weeping shutoff valve produces water that runs down the back of the toilet and pools at the floor — which looks exactly like a wax ring failure from across the bathroom. This cause is present between flushes as well as during them, which is the key diagnostic difference.
Supply line connections fail at three points: the compression fitting at the shutoff valve (especially in homes with hard water mineral buildup at the valve seat), the coupling nut at the tank inlet, and the braided hose itself if it is more than 5–7 years old or was over-tightened at installation. A slow drip from any of these points is invisible for months before it becomes a visible floor puddle.
How to confirm: Water is present without a flush. The toilet paper placed behind the toilet (near the supply line) gets wet before the paper at the front base. Running your finger along the supply line reveals a damp section or mineral deposits at a fitting.
Cause 5 — Cracked Toilet Base Porcelain
Hairline fractures in the toilet bowl or base are less common than the other four causes but produce some of the most misleading symptoms. A crack at the base releases a small amount of water with each flush — sometimes from a crack on the rear or side of the bowl where it is invisible without a flashlight inspection.
Porcelain fractures occur from impact damage, over-tightened floor bolts that crack the base from below, or freeze damage in toilets left without water in cold climates. The crack is not repairable in any durable way. Epoxy and porcelain repair compounds extend the life of the fixture by weeks, not years.
How to confirm: Inspect the full perimeter of the base with a flashlight after thoroughly drying the surface. A hairline crack visible under directed light, combined with water appearing at that specific location after flushing, confirms this cause. Full toilet replacement is the only correct repair.
How to Fix a Toilet Leaking at the Base — Step-by-Step
The repair procedure for Causes 1 and 2 (wax ring and tee bolts) follows the same core steps — removing the toilet, inspecting the flange, replacing consumable parts, and resetting the fixture. Cause 3 (flange damage) follows these same steps but adds flange repair before resetting. Cause 4 (supply line) is handled independently without removing the toilet. Cause 5 requires toilet replacement.
🔧 Tools and Materials Required
Tools
Adjustable wrench or channel-lock pliers
Putty knife or 5-in-1 tool
Hacksaw (for corroded bolt removal)
Bucket and sponge
Flashlight
Rubber gloves
Materials
Wax ring (standard or extra-thick for low flanges)
Tee bolt kit with new nuts and washers
Toilet shims (if floor is uneven)
New braided supply line (if replacing)
Plumber’s tape (PTFE)
Old towels or drop cloth
Step 1 — Shut Off Water and Empty the Toilet
Turn the shutoff valve at the wall fully clockwise. Flush the toilet to evacuate the tank. Hold the flush handle down to drain as much water as possible from the bowl. Use a sponge and bucket to remove remaining water from both the tank and bowl — the toilet is significantly heavier when full, and residual water spills during removal.
Step 2 — Disconnect the Supply Line
Unscrew the coupling nut connecting the supply line to the tank inlet. Have a towel ready — a small amount of residual water will drain. If the line is older than 6 years or shows any corrosion at the fittings, replace it now while the toilet is off the floor. A new braided stainless supply line costs $8–$12 and removes one potential future leak point.
Warning: Do not use excessive force on the coupling nut if it feels seized. Plastic tank inlet fittings crack easily. Apply penetrating oil and wait 5 minutes before attempting again.
Step 3 — Remove the Tee Bolt Caps and Nuts
Pop off the decorative plastic caps at the base of the toilet on each side. Unscrew the nuts from the tee bolts using an adjustable wrench. If the bolts spin freely, grip the bolt shank with pliers while turning the nut. If the bolts are corroded flush with the floor or the nuts will not break free, cut through the bolt shanks with a hacksaw at floor level. New tee bolt kits include replacement bolts, nuts, and washers for under $10.
Step 4 — Remove the Toilet
Rock the toilet gently side to side to break the wax seal adhesion. Lift straight up — a standard two-piece toilet bowl weighs 60–80 lbs. Have a second person assist or use a toilet dolly for heavier units. Carry the toilet to a protected surface (old towels or a drop cloth). Stuff a rag into the drain opening immediately to block sewer gases while the toilet is removed.
Warning: Never set a toilet on its side — the trapway can crack under the weight. Always set it upright on cardboard or towels.
Step 5 — Inspect the Flange and Remove the Old Wax Ring
With the toilet removed, examine the flange directly. Use a putty knife to scrape all old wax from both the flange ring and the bottom of the toilet horn. Do not skip this step — new wax set over old wax does not compress correctly and produces an inferior seal. Once clean, assess flange condition: look for cracks in the ring, missing or damaged tee bolt slots, and flange height relative to the finished floor.
Flange height check: The top of the flange ring should be at or up to ¼ inch above the finished floor surface. If it sits flush with the tile or below, use a thick double-horn wax ring or a wax ring with a plastic extension horn to bridge the gap. A flange that sits more than ½ inch below the finished floor requires a flange extender ring before proceeding.
Step 6 — Install New Tee Bolts and Wax Ring
Slide new tee bolts into the flange slots — they should sit at the 3 o’clock and 9 o’clock positions (directly to each side of the drain opening). Press the new wax ring onto the bottom outlet horn of the toilet, not onto the flange — this gives you better control during alignment. The wax ring installs with the rounded wax side facing away from the toilet, toward the flange.
Step 7 — Set the Toilet and Secure the Bolts
Lower the toilet straight down over the flange, aligning both bolt holes simultaneously. Apply your body weight evenly and press down firmly — you will feel the wax compress. Do not rock the toilet once it contacts the wax. Sit on the toilet to complete compression, then install washers and nuts on the tee bolts. Tighten nuts alternately (left, right, left, right) in small increments until the toilet does not rock. Stop at snug — overtightening cracks the porcelain base.
Warning: Never use an impact driver or power tool on tee bolt nuts. Hand-tight plus one-quarter turn is the correct torque. Porcelain has zero flex — overtightened bolts crack the base within 24 hours of installation.
Step 8 — Reconnect and Test
Reconnect the supply line, turn the shutoff valve counterclockwise to restore water, and allow the tank to fill fully. Place fresh toilet paper around the entire base perimeter. Flush 5 times — the first two flushes will show whether the wax ring is sealing under pressure. If the paper remains dry after 5 flushes, the repair is complete. Cut the tee bolt shanks flush with the tops of the nuts using a hacksaw, then reinstall the plastic caps.
Fixing a Supply Line Leak (Cause 4 — No Toilet Removal Required)
Shut off the supply valve and disconnect the braided supply line from both ends. Replace the line entirely — these cost $8–$15 and the labor of trying to re-seal an old fitting with PTFE tape is rarely worth the risk of a second failure.
If the shutoff valve itself is weeping from the packing nut, tighten the nut one-quarter turn. If it continues to drip, the valve requires replacement. A standard angle stop shutoff valve costs $12–$20 at any home center and takes 20 minutes to swap with the main water supply off.
Red Flags — Stop and Call a Plumber
Most toilet base leaks are DIY-repairable. But several conditions turn a simple job into structural damage territory if a homeowner continues past the point of competence. Stop immediately and call a licensed plumber if you encounter any of the following.
🚨 Red Flag 1 — The Floor Feels Soft or Spongy Around the Toilet
A springy or soft floor means the subfloor has been absorbing moisture for months, possibly years. Subfloor rot changes the entire scope of this job — the flange is no longer sitting on solid material, and resetting a toilet on a rotted subfloor produces a seal that fails immediately. This condition requires a contractor to cut the floor, assess and replace the subfloor, and rebuild from the drain pipe up.
🚨 Red Flag 2 — The Flange Is Cracked Below the Floor Plane
Surface flange cracks (at the ring level, visible without cutting) can sometimes be addressed with a repair collar kit. But a crack that extends into the pipe section below the floor level means the drain connection itself has failed. In cast iron drain systems — common in homes built before 1970 — this requires cutting into the subfloor to access the hub joint and transition the drain to PVC. This is licensed plumber work in every jurisdiction.
🚨 Red Flag 3 — The Toilet Continues Leaking After a Correct Wax Ring Installation
If you have replaced the wax ring, installed new tee bolts, confirmed the flange height is correct, and the toilet still leaks at the base — something else is wrong. The most likely explanation is a drain line obstruction creating back-pressure that forces water past a properly set seal, or a flange crack that is not visible without removing flooring. Do not install a third wax ring. Call a plumber for camera inspection of the drain.
🚨 Red Flag 4 — Black or Green Mold at the Base of the Wall
Visible mold at the junction of the toilet base and the wall baseboard means water has been traveling laterally across the subfloor for long enough to support mold growth — typically 48–72 hours of sustained moisture minimum. The mold you can see is a fraction of what is present inside the wall cavity and under the flooring. Mold remediation must precede any plumbing repair in this situation.
What Competitors Miss — The New Install Leak Problem
Almost every guide covering toilet base leaks assumes you have an established, long-installed toilet. What they all miss is one of the most common real-world call patterns I see: the toilet that leaks at the base immediately after a new installation or wax ring replacement.
A toilet leaking at the bottom after a new install is almost never a defective wax ring. In 90% of new-install leaks, one of three installation errors is responsible: the flange was too low for the floor thickness and the wax ring selected did not bridge the gap; or the tee bolts were not set square in the flange slots, causing the toilet to sit at an angle that opens one side of the wax seal.
The third error: the installer rocked the toilet while positioning it, shearing the wax before the first flush. New wax that gets sheared during installation cannot re-seat — the toilet must come back off, the wax replaced, and the procedure done correctly.
When the Answer Flips — When a Wax Ring Replacement Is the Wrong Repair
If the toilet leaks at the base but no flush is required to trigger it — if water is present at 2 AM with no usage for hours — replacing the wax ring fixes nothing. The wax ring only passes water during a flush cycle. A constant leak with no flush triggering it means the source is the supply line, shutoff valve, or tank condensation in a high-humidity bathroom.
Before removing a toilet for a wax ring swap, spend five minutes confirming the leak timing. It is one of the most expensive misdiagnoses in routine bathroom plumbing.
Similarly, if your toilet has been installed for less than two years and starts leaking at the base, do not assume the wax ring has simply worn out — wax rings do not fail in two years under normal conditions. Investigate flange height, tee bolt torque, and whether the toilet itself is rocking before condemning a wax ring that may still be intact.
Frequently Asked Questions
Why does the toilet leak at the base only when flushed?
When a toilet leaks at the base only when flushed, the wax ring or tee bolts are almost always responsible. Flushing creates pressure inside the trapway that forces water past a compromised seal — one that holds fine under the toilet’s static weight between flushes. A leak that worsens over time or shifts location points to tee bolt loosening progressively distorting the wax.
How long does a toilet wax ring last?
A properly installed wax ring typically lasts 20–30 years. The wax does not degrade under normal conditions — it stays pliable and holds its seal as long as the toilet above it does not move. The wax ring fails prematurely when the toilet rocks, when floor tile addition changes the flange height, or when corroded tee bolts allow the toilet to shift. A wax ring on a toilet that still moves after reinstallation fails within 6–18 months.
Can I replace a toilet wax ring without removing the toilet?
No. The wax ring sits between the bottom of the toilet and the floor flange — accessible only by lifting the toilet completely off the floor. Any product marketed as a wax ring fix that skips toilet removal is addressing a different component. Replacing a wax ring always requires disconnecting the supply, removing the tee bolt nuts, lifting the toilet, scraping the old wax, and resetting. There is no shortcut.
What causes toilet to leak around base after a new wax ring was just installed?
Three installation errors account for most new wax ring failures: the flange sits too low for the finished floor height (a standard ring won’t bridge the gap — use an extra-thick ring); the toilet was rocked or shifted during setting, shearing the wax before compression; or the tee bolts were overtightened immediately, tilting the toilet and opening one side of the seal. If a new wax ring is leaking, the toilet must come off again and flange height must be confirmed correct before reinstalling.
How do I know if the toilet flange is cracked?
The flange is only fully visible after removing the toilet and scraping the old wax from the flange surface. Look for cracks radiating outward from the tee bolt slots — these are the highest-stress points on any flange. On PVC flanges, cracks appear as clean hairline fractures. On cast iron, look for rust breakthrough and areas where the metal has corroded away entirely.
A flange with cracks at the bolt slots cannot hold tee bolts securely enough to maintain wax ring compression. Even a correctly installed new wax ring will fail within weeks if set onto a cracked flange — the toilet will continue leaking at the base until the flange itself is repaired or replaced.
Is it safe to use the toilet if it’s leaking at the base?
Using a toilet with a confirmed wax ring failure is not physically dangerous in the short term, but every flush worsens the subfloor damage. Wastewater — not clean supply water — is what leaks past a failed wax ring. This water contains pathogens and promotes aggressive mold growth in the subfloor and underlayment.
If you cannot repair immediately, minimize flush frequency and keep the area dry between uses. Do not let the repair wait more than a few days — the difference between a $50 wax ring repair and a $1,500 subfloor job is often a matter of weeks.
Professional Verdict — 3 Key Takeaways
If water appears only during or right after flushing → Start with tee bolt inspection before removing the toilet. Tightening loose bolts costs nothing and stops roughly 20% of post-flush leaks without a full wax ring replacement.
If water is present between flushes → Do not remove the toilet yet. Inspect and replace the supply line first. A $10 supply line replacement fixes more “base leaks” than most homeowners expect.
If the floor is soft, the flange is cracked below the surface, or the toilet keeps leaking after a correct wax ring installation → Stop the DIY repair and call a licensed plumber. These conditions require tools, access, and code compliance that fall outside consumer repair territory.
A toilet base leak caught within 48 hours is a $30–$80 repair. The same leak ignored for 3 months becomes a subfloor and mold remediation project that costs $1,000–$3,000. Act fast, diagnose correctly, and fix the actual cause.
Toilet Leaking From the Base When Flushed — What That Pattern Means
A leak that appears specifically when flushed — and only then — is one of the most useful diagnostic patterns in toilet repair. It tells you the leak source is pressurized by flush action, which narrows the field to two components: the wax ring or the tee bolt compression. Static sources like supply lines and shutoff valves drip continuously and are not triggered by flushing.
The flush cycle temporarily raises internal pressure inside the trapway as waste and water surge through the horn opening. If the wax ring is failing, that pressure surge pushes water outward past the compromised seal. The water then travels between the toilet base and the floor tile before appearing as a puddle.
Because the water wicks under the base, it often appears 6–8 inches away from the actual seal failure point, which confuses homeowners attempting to diagnose the location.
If your toilet leaks from the base when flushed, begin the repair by checking tee bolt tightness before removing the toilet. If both bolts are firm and the toilet does not rock, the wax ring requires replacement. Review the current best toilets guide if the fixture itself is more than 15 years old — a leaking older toilet may be better replaced than repaired, particularly if the flange condition is also questionable.
Toilet Base Leak Wax Ring — DIY Replacement Without Guessing
Replacing a toilet wax ring is a fully achievable DIY task for anyone comfortable lifting 65–80 lbs and working in a confined bathroom space. The job takes 45–90 minutes for a first-timer and 20–30 minutes for anyone who has done it once. The most important variable is wax ring selection — and it is where most DIYers make their only error.
Standard wax rings are designed for a flange that sits at or slightly above the finished floor. If your bathroom has been retiled since the toilet was last installed — adding a layer of tile and adhesive on top of the original subfloor — the flange now sits lower relative to the floor surface. A standard wax ring will not provide adequate compression in this situation.
Purchase an extra-thick wax ring (sometimes called a “double wax” or “wax ring with extension horn”) whenever the flange sits more than ¼ inch below the floor surface.
Waxless gasket rings made from rubber or foam are increasingly popular for their reusability and cleaner installation. They perform well in stable flange conditions but are less forgiving of flange height variation than properly selected wax. For any installation where the flange is not exactly at the correct height, traditional wax remains the more reliable choice.
If you are considering upgrading the toilet during this repair, see the best flushing toilets guide and the best one-piece toilets guide for current top-rated options across price tiers.
Cracked Toilet Flange Repair — What You Can Fix and What Requires a Pro
A cracked toilet flange is not always a contractor-level repair — it depends entirely on where the crack is located and what material the flange is made of. Knowing the difference saves significant money on repairs that do not require professional intervention.
PVC flange cracks that occur at the ring surface — the flat collar portion — are repairable with a stainless steel repair ring. These rings bolt through the existing flange and extend the tee bolt slot positions outward, bypassing the cracked section entirely. They cost $12–$25, install with masonry screws into the subfloor, and provide a solid tee bolt seating surface without requiring the existing flange to be cut out.
This repair works when the crack is confined to the ring surface — not when it extends into the pipe section below the floor.
Cast iron flanges in older homes require different handling. Hairline cracks in the cast iron ring can sometimes be bridged with a repair collar, but heavily corroded or fully separated cast iron flanges cannot be repaired at the surface level. The repair involves cutting out the old hub joint below the floor, transitioning to PVC drain pipe, and installing a new PVC flange at the correct height.
This is plumber-only work — it involves cutting cast iron inside a drain chase and making a code-compliant drain transition. Any toilet installed after this repair should be a quality two-piece toilet that is easy to remove for future flange access if needed.
The critical diagnostic rule for cracked toilet flange repair: if the toilet continues to leak at the base after a correctly installed new wax ring, inspect the flange before condemning the wax ring. The flange is the foundation every seal depends on.
A $25 repair ring on a surface crack is a legitimate fix. Pressing a new wax ring into a deteriorated cast iron flange is not — it will fail again, and this time the wax ring replacement cost will not be the only bill.