Your toilet fill valve keeps running nonstop — that constant hissing or water noise in the tank is more than annoying. It’s quietly wasting hundreds of gallons of water every month and driving up your bill. In my 20+ years installing and repairing toilets across thousands of homes, I’ve seen this exact issue hundreds of times. The good news? 90% of the time you can diagnose and fix it yourself in under 15 minutes with no special tools.
This guide walks you through the precise steps to stop a toilet fill valve that won’t shut off. You’ll learn how to tell if the fill valve is truly the culprit (versus the more common flapper leak), the exact causes, and the professional repair sequence that actually works.
Most homeowners assume the fill valve is bad when the toilet keeps running. In reality, 70% of “running toilet” complaints are actually a leaking flapper allowing water to slowly drain into the bowl, which triggers the fill valve to turn on periodically. We’ll show you the 30-second test to know for sure before you touch the fill valve.
Who This Guide Is For & What It Covers
Scope of this expert procedural guide:
• Homeowners with basic hand tools who want to stop water waste immediately
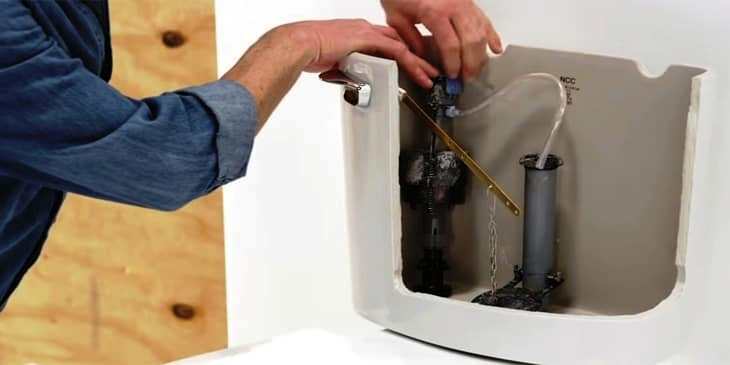
• Toilets where the fill valve (tall mechanism on the left side of the tank) is clearly the source of nonstop running
• Modern gravity-fed tanks (most homes built after 1995)
What this guide does NOT cover:
• Wall-mounted or pressure-assist toilets
• Commercial fixtures or 1.0 GPF high-efficiency valves with proprietary parts
• Complete tank replacement or flange repair
If your tank is cracked, the supply valve is seized, or water is leaking from the base of the tank, stop and call a licensed plumber.
Tools & Materials You’ll Need
Gather these before you start — everything is available at any hardware store for under $25 total:
- Adjustable pliers or channel locks
- Flathead screwdriver
- Bucket and old towels (for spills)
- Replacement fill valve seal kit (Fluidmaster 242 or equivalent) OR universal fill valve (Fluidmaster 400A recommended)
- Optional: food coloring for leak test
See our full review of the best toilet fill valves here if you decide replacement is the fastest fix.
Step-by-Step Procedure: Fix Your Running Toilet Fill Valve
Red Flags — Stop and Call a Plumber
When the Answer Flips — When to Skip DIY
Head-to-Head: Fill Valve Problems vs Flapper Problems
| Symptom | Fill Valve Issue | Flapper Issue |
|---|---|---|
| Water level in tank stays full but you hear constant running | ✅ Yes (overflow tube) | No |
| Tank level slowly drops then refills every few minutes | No | ✅ Yes (most common) |
| Water runs even when float is lifted manually | ✅ Yes | No |
Frequently Asked Questions
Q1: Why does my toilet fill valve keeps running even after I replaced it?
The most common reason a brand-new fill valve still runs is incorrect float height or the refill tube sitting below the water line (causing siphon). Re-adjust the float so water stops ½ inch below the overflow tube and make sure the refill tube clips securely to the overflow pipe, not submerged.
Q2: How much water does a running fill valve waste?
A continuously running fill valve wastes 3–5 gallons per hour — that’s 70–120 gallons per day or over 2,000 gallons per month in severe cases. At average U.S. water rates that equals $25–$80 extra per month on your bill.
Q3: Can high water pressure cause the fill valve to keep running?
Yes. Pressure over 80 PSI prevents the internal seal from closing fully. Install a pressure-reducing valve on your main line or right at the toilet supply if your home has high pressure.
Q4: Is it better to repair or replace a toilet fill valve that won’t shut off?
For valves over 4–5 years old, replace the entire unit. New universal valves cost less than $15 and last 8–12 years with proper installation. Seal kits only make sense for very new valves.
Q5: My toilet fill valve keeps running after new install — what did I do wrong?
Usually the lock nut under the tank isn’t tight enough or the valve is sitting too high. Hand-tighten the nut, then give it exactly ¼ turn with pliers. Never overtighten or you’ll crack the porcelain tank.
Q6: How quiet should a fill valve be after repair?
A properly adjusted modern fill valve should be almost silent once the tank is full. Any ongoing hiss or gurgle means the seal still isn’t closing completely — clean or replace again.
VERDICT / SUMMARY
• If the tank level is stable but you hear running → adjust or clean the fill valve first.
• If cleaning fails → replace the entire valve (takes 10 minutes).
• If water level drops with supply off → fix the flapper instead.
Follow these steps exactly and your toilet will run only when it should — saving water and money immediately.
How to Adjust a Toilet Fill Valve to Stop Running
Float adjustment is the fastest fix for most running fill valves. On cup-style valves, slide the float down until water stops exactly ½ inch below the overflow tube. Test by flushing. Older ball-float valves require gently bending the arm down. Never set the water level higher than the manufacturer mark — it forces water over the overflow and keeps the valve running. This single change often eliminates the need for replacement entirely. See the top-rated valves that are easiest to adjust.
Toilet Tank Keeps Filling and Running Water — What to Check First
When the tank keeps filling nonstop, the fill valve is not receiving the “shut off” signal from the float. This happens most often from mineral buildup, a worn diaphragm, or a float that’s stuck too high. Always start with the 30-second float-lift test before buying parts. If the valve shuts off when you hold the float up, the problem is mechanical and fixable in minutes. Hard-water areas see this failure 3–4 times more often than soft-water homes.
Toilet Fill Valve Won’t Shut Off After Flush — Professional Fix
The fill valve should stop completely within 10–15 seconds after the tank refills. If it keeps running, the internal seal is the usual culprit. Replacing just the seal is faster and cheaper than a full valve swap on newer units. Always flush the valve body with full pressure (cap off) before installing the new seal to clear any remaining debris. After repair, listen carefully — a properly working valve is nearly silent. For the best long-term results, upgrade to a high-quality universal valve rated for quiet operation. Our top pick for quiet, reliable replacement is here.
A running toilet fill valve is one of the quickest and cheapest plumbing problems you can solve yourself. Follow the steps above and you’ll stop the waste immediately. Need a new fill valve? Check our complete review of the best toilet fill valves for 2026. Have questions about your specific model? Drop a comment below — I answer every one.