Geberit concealed cistern toilets deliver clean lines and reliable performance — until the day the toilet starts running constantly or the half flush suddenly stops working. The good news? These common Geberit toilet problems can almost always be diagnosed and fixed yourself through the flush plate without breaking any tiles or calling a plumber.
This expert procedural guide is written specifically for homeowners with a Geberit wall-hung dual-flush system (Sigma, Kappa, or similar concealed cistern models). After reading you will know exactly how to isolate the symptom, follow the precise repair sequence, and verify the fix works — all while staying safe and avoiding hidden water damage.
This guide covers the most frequent Geberit concealed cistern repairs that you can perform safely through the flush plate access point. It assumes you have basic hand tools and can follow numbered instructions. It does NOT cover carrier frame removal, full toilet detachment, or major plumbing rerouting. If water is leaking from behind the wall or you cannot shut off the supply valve, stop and call a licensed plumber immediately.
They assume the entire mechanism must be replaced and buy an expensive kit when a single $8–15 gasket or 15-minute descale fixes the issue. Another frequent error: attempting any repair without first turning off the water supply valve — this floods the wall cavity and turns a simple job into expensive damage.
Tools and Materials You Will Need
Gather these items before you start any repair. Having everything ready prevents you from stopping mid-job with the water turned off.
- Flathead screwdriver or plastic trim removal tool (for flush plate)
- Adjustable wrench or pliers (for supply hose if needed)
- Vinegar or citric acid descaler solution
- Clean rags or sponge
- Flashlight (to see inside the cistern)
- Replacement parts: flush valve gasket kit, fill valve diaphragm, or bell latch repair kit (match your exact model number)
- Towel to catch any residual water
Condition Map — Match Your Symptom to the Right Repair
Geberit systems have two main valves inside the concealed cistern. Match your exact symptom to jump to the correct detailed repair sequence below.
- Constant running or water overflowing into bowl → flush valve seal or fill valve
- Small (half) flush not working → broken bell latches or actuator linkage
- Leaking or trickling from cistern → worn gaskets or pipe connections
- Hissing noise after flush → fill valve diaphragm or debris
- Flush plate buttons sticking or no response → actuator rods misaligned
How to Fix a Geberit Toilet Running Constantly
This is the #1 Geberit toilet problem. Water keeps flowing and you hear constant running, wasting 5–15 gallons per hour. The cause is almost always the silicone gasket on the flush valve failing to seal.
1. Locate the water supply valve — a small lever or knob either directly behind the flush plate or on the flexible supply hose inside the cistern opening. Turn it fully clockwise (to the right) until it stops firmly. You should hear water flow stop completely within 2–3 seconds. Wait 30 seconds and confirm the cistern is no longer filling.
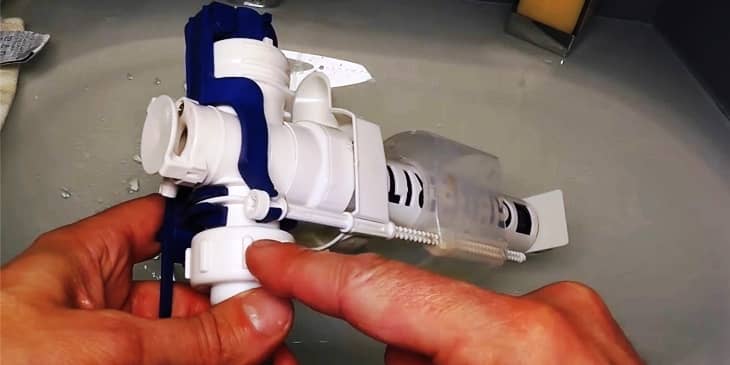
2. Remove the flush plate: Slide your fingers under the bottom edge, lift upward 5–10 mm to release the retaining clips, then pull the entire plate straight toward you. Place it on a towel. If it resists, wiggle gently side to side — do not force it.
3. Shine your flashlight into the opening and locate the tall cylindrical flush valve (it has two blue or black release tabs on opposite sides). Press both tabs inward at the same time while lifting the valve straight up and out. Note the exact orientation for reinstallation.
4. Turn the valve upside down and inspect the flat round silicone gasket at the bottom. Look closely for blisters, cracks, limescale rings, or flattening. If any damage is visible, gently peel the old gasket off.
5. Clean the valve body and seat area thoroughly with vinegar solution or citric acid descaler. Let it sit 5 minutes, then wipe with a clean rag. Install the new gasket if needed, pressing it firmly into place until it sits flat.
6. Lower the flush valve straight down into the cistern until the two tabs click audibly into position. Give it a firm downward press to ensure it is fully seated and level.
7. Turn the water supply valve counterclockwise (left) to restore flow. Listen as the cistern fills — it should stop completely within 60–90 seconds with no running or dripping sound.
8. Reinstall the flush plate by aligning it with the clips and pressing firmly until it snaps into place. Test the full flush button first, then the half flush. The toilet should now fill silently and stay silent.
If water still runs after step 7, the fill valve float may need adjustment or the diaphragm replaced — proceed to the hissing repair section.
How to Fix Geberit Small Flush Not Working
The half-flush button does nothing while the full flush still works. This dual-flush issue is caused by broken plastic latches on the flush bell inside the cistern.
1. Shut off the water supply valve exactly as described in step 1 of the constant-running repair above. Confirm water flow has stopped.
2. Remove the flush plate using the same lift-and-pull motion from step 2 above.
3. Inside the cistern, locate the large cylindrical flush bell sitting on top of the flush valve. Gently lift any inner lid or cover if present, then lift the bell straight up and out. Set it aside carefully.
4. Inspect the two small plastic latches or hooks on the side of the bell. They should be intact and springy. If either is broken, cracked, or missing, this is the exact cause of the small-flush failure.
5. Replace the latches with the official Geberit repair kit or compatible drop-in parts (match the model number stamped on the bell). Snap the new latches firmly into position until they click.
6. Lower the repaired flush bell straight back down onto the flush valve until it seats firmly and level. You should feel it lock into place.
7. Turn the water supply valve back on and wait for the cistern to fill completely (60–90 seconds).
8. Test only the small flush button first — it should now release the correct half volume with a firm click. Then test the full flush. Both buttons should feel responsive.
Reinstall the flush plate only after both flushes test correctly. This repair restores proper water-saving dual-flush function.
How to Fix Geberit Concealed Cistern Leaking or Trickling
Slow drip after flushing or constant trickle into the bowl points to a worn gasket or debris preventing a full seal.
1. Turn off the water supply valve using the exact method from the constant-running repair (step 1).
2. Remove the flush plate exactly as described in step 2 above.
3. Lift out the flush valve assembly by pressing the two release tabs and pulling straight up.
4. Thoroughly clean the silicone gasket and the valve seat area with descaler solution and a rag. Remove every trace of limescale or debris.
5. Inspect the gasket underside for blisters, flattening, or cuts. If any damage is visible, replace the gasket by pressing the new one firmly into the groove until it sits perfectly flat.
6. Check the supply hose connection at the fill valve — hand-tighten it, then add one quarter turn with the wrench if loose.
7. Reinstall the flush valve by lowering it straight down until the tabs click. Press firmly to seat it.
8. Restore water supply and wait for the cistern to fill. Watch the bowl for 5 full minutes — no drip or trickle means the repair is successful. If trickling continues, the flush pipe seal at the carrier frame has failed.
How to Stop Geberit Toilet Hissing After Flush
Hissing comes from the fill valve diaphragm not seating properly or limescale blocking the inlet.
1. Shut off the water supply valve exactly as in step 1 of the constant-running repair.
2. Remove the flush plate using the lift-and-pull method.
3. Locate the smaller fill valve unit (it has a float arm attached). Unscrew the flexible supply hose connection using your adjustable wrench — turn counterclockwise.
4. Carefully lift the entire fill valve assembly straight up and out of the cistern.
5. Twist off the diaphragm cover on the fill valve (it unscrews by hand). Pull out the rubber diaphragm and inspect it for cracks, stretching, or limescale.
6. Clean the diaphragm and the valve chamber thoroughly with vinegar solution. Replace the diaphragm if it is damaged.
7. Reassemble the fill valve by snapping the cover back on, then lower the complete unit back into the cistern until it sits firmly.
8. Reconnect the supply hose (hand-tight plus quarter turn), turn the water supply back on, and listen carefully — the hissing should stop within 10 seconds after the cistern fills completely.
Red Flags — Stop and Call a Plumber Immediately
These signs indicate a failed flush pipe seal or carrier frame issue that requires removing the toilet — a job that risks major water damage if done incorrectly.
Unique Section — What Most Repair Guides Miss About Geberit Systems
Every repair begins and ends by removing only the flush plate. No tiles or drywall need to come off for the 80% of issues covered here. Most online videos show one symptom and stop — none give the full symptom-to-fix map or the exact “click” verification after reassembly.
Every 12 months: shut off water, remove the flush valve, descale everything with citric acid, and inspect all gaskets. This single habit prevents 90% of Geberit toilet problems before they start.
If you complete any repair sequence above and water still runs, hisses, or leaks — or if you see moisture anywhere behind the wall — stop immediately. These are signs the carrier frame or flush pipe seal has failed and requires full toilet removal.
Frequently Asked Questions
1. What are the most common Geberit toilet problems?
The top three issues are constant running from a failed flush valve gasket, small flush failure from broken bell latches, and hissing from the fill valve diaphragm. All three are caused by normal wear and limescale in hard water areas and are repaired through the flush plate in under 30 minutes when you follow the exact sequences above.
2. How do I fix a Geberit toilet running constantly?
Shut off the water supply valve, remove the flush plate, lift out the flush valve, inspect and clean or replace the bottom silicone gasket, reinstall the valve, restore water, and test. This single gasket fix resolves 70% of running toilets. Always verify the cistern fills completely and stops with no drip before reinstalling the plate.
3. Why is my Geberit toilet hissing?
Hissing is caused by the fill valve diaphragm not seating or limescale buildup. Shut off water, remove the fill valve, clean or replace the diaphragm, reinstall, and turn water back on. The noise should stop within 10 seconds after the cistern refills completely.
4. Can I replace the Geberit flush valve myself?
Yes. Most Geberit models use drop-in replacement valves. Follow the constant-running repair sequence above, remove the old valve by pressing the blue tabs, insert the new valve until it clicks, and test both flushes. See our best dual flush toilet guide for compatible valve options.
5. How do I fix Geberit concealed cistern leaking?
Access through the flush plate, clean and replace the flush valve gasket and check supply hose connections. If the leak is at floor level behind the toilet, the flush pipe seal has failed and the entire toilet must be removed by a professional to prevent hidden wall damage.
6. Are Geberit dual flush issues easy to repair?
Yes. When only the small flush fails, the bell latches or actuator rods are usually the cause. Shut off water, remove the bell, replace the latches, reinstall, and test. This quick fix restores proper water-saving function and prevents overuse of the full flush.
If your Geberit toilet runs constantly or leaks into the bowl → follow the flush valve gasket repair sequence first.
If only the small flush fails → repair the bell latches or actuator linkage using the dedicated steps.
If you hear hissing or the flush plate sticks → clean or replace the fill valve diaphragm and rods.
When water appears behind the wall or you cannot safely isolate the supply → call a plumber immediately to avoid costly hidden damage.
Geberit Flush Valve Replacement Guide
Replacing the flush valve follows the same access sequence as the constant-running repair. Match your exact model number stamped on the old valve. After installation, always test both flushes and listen for complete shut-off. This upgrade often eliminates recurring Geberit toilet problems for years. For broader dual-flush performance comparison, see our best dual flush toilet guide.
Geberit Concealed Cistern Leaking — Prevention Tips
Annual gasket inspection through the flush plate prevents most leaks. If you ever notice moisture around the base or hear sounds from inside the wall, stop all DIY and consult a professional. Our best wall mounted toilet guide explains full system maintenance and when professional service is required.
Geberit Dual Flush Issues and Long-Term Water Savings
When dual-flush function is restored with the steps above, your Geberit system returns to its designed 3 L / 6 L (or equivalent) efficiency. Regular maintenance keeps both flushes reliable and prevents the common mistake of always using the full flush. For more on performance across brands, visit our best dual flush toilet guide. One final expert tip: in hard-water areas, schedule descaling every 12 months to keep every component working exactly as designed.
With the detailed sequences above, you can confidently resolve almost any Geberit toilet problem yourself. For full wall-hung system overviews and installation tips, see our best wall mounted toilet page.