If your toilet suddenly delivers a weak flush or stops flushing altogether, the culprit is often the siphon mechanism hidden inside the cistern. Unlike the more common flapper valves found in most U.S. toilets, a toilet siphon (also called a cistern syphon or bell siphon) relies on physics alone—no electricity or complex parts—to empty the tank. A failed siphon wastes hundreds of gallons of water every month and can lead to overflowing or constant running. In my 20+ years installing and repairing toilets, this is one of the most misunderstood but fixable components.
This expert procedural guide explains exactly what a toilet siphon is, how the mechanism works, and gives you complete step-by-step instructions to clean it, repair a torn diaphragm, or replace the entire unit. You’ll finish knowing precisely when to handle the job yourself and when to call a plumber before water damage occurs.
The #1 error is attempting to fix or replace a toilet siphon without first turning off the water supply and flushing the tank completely empty. This leads to unnecessary flooding inside the cistern and risks cracking the porcelain or stripping threads on the outlet pipe. Always isolate the water and empty the tank first.
• Written for homeowners comfortable with basic hand tools
• Covers standard cistern syphon (bell siphon) toilets common in many older U.S. homes, UK-style imports, and dual-flush models
• Includes how the bowl siphon jet works for context
• Does NOT cover full toilet replacement or modern canister flush valves
• Assumes you can safely shut off the water supply at the angle stop valve
• When in doubt, stop and call a licensed plumber—water damage repairs average $2,500+ in the U.S.
What Is a Toilet Siphon?
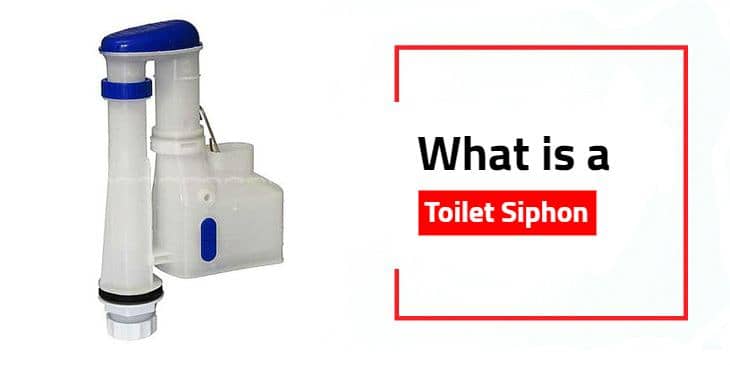
A toilet siphon is a simple but clever U-shaped tube (or bell-shaped housing) inside the toilet cistern that uses gravity and atmospheric pressure to rapidly empty the tank water into the bowl. It has no moving seals like a flapper valve. Instead, it creates a siphon effect once primed with water. The most common type is the bell siphon, which features a flexible rubber or plastic diaphragm at the base.
In contrast to the bowl’s trapway siphon (the S-shaped pipe under every toilet that actually pulls waste away), the cistern siphon controls how the tank water is released. Many dual-flush toilets use a siphon design because it allows precise half-flush or full-flush volumes without wasting water.
How Does a Toilet Siphon Work?
The bell siphon mechanism is pure physics in action. Here is exactly how it works, step by step:
1. The cistern fills with water from the fill valve. Water level rises equally inside and outside the bell housing.
2. You press the flush handle or button. This lifts the rod connected to the diaphragm at the very bottom of the bell.
3. The diaphragm pushes upward, forcing a column of water up into the upside-down U-bend inside the bell housing.
4. Once water flows over the highest point of the U-bend, gravity pulls the longer column of water downward on the outlet side.
5. This creates a vacuum (low pressure) inside the bell. Atmospheric pressure on the open surface of the tank water forces the rest of the tank contents up and over the bend in one powerful rush—even after you release the handle.
6. Water continues flowing until the tank is nearly empty. Air then enters the bell through the open top or small vent holes, breaking the vacuum and stopping the siphon.
7. The tank refills automatically via the fill valve.
The siphon jet in the bowl (small hole at the front base) then helps initiate the bowl trapway siphon for waste removal. This is why a weak cistern siphon often results in a partial bowl flush even if the tank empties. The entire process relies on gravity, atmospheric pressure, and a perfect seal at the diaphragm—no moving rubber flaps required.
How to Clean a Toilet Siphon
Mineral buildup, limescale, and debris are the most common reasons a siphon stops priming properly. Here is the complete detailed process:
Turn off the water supply at the angle stop valve behind the toilet (turn clockwise until it stops). Flush the toilet once to empty the tank. Use a sponge or old towel to soak up any remaining water at the bottom of the cistern. Place a bucket underneath the cistern outlet in case of drips.
Remove the cistern lid carefully and set it aside on a towel. Unhook the chain or disconnect the flush lever arm from the siphon rod (usually a simple clip or hook). Take a photo with your phone for reassembly reference.
Crawl under the cistern if it is close-coupled. Locate the large plastic nut on the underside where the siphon outlet pipe exits the cistern. Unscrew this nut counterclockwise (it may be very tight—use an adjustable wrench if needed, but protect the plastic). Gently lift the entire siphon assembly straight up and out through the top of the cistern.
Most bell siphons split into two or three sections. Unscrew or unclip the base plate that holds the diaphragm. Remove the diaphragm and set it aside. Inspect for tears, hardening, or heavy scale. Check the outlet pipe and U-bend for blockages.
Place all plastic and metal parts (except rubber diaphragm) in a large bowl or bucket filled with white vinegar or a commercial descaler. Soak for 45–60 minutes (longer for heavy limescale). Use an old toothbrush or toilet brush to scrub every surface, especially inside the bell housing and outlet pipe. Rinse thoroughly under running water until no residue remains.
Apply a thin layer of plumber’s silicone grease to all seals. Reinstall the diaphragm exactly as it was (smooth side down). Reassemble the siphon unit. Lower it back into the cistern, align the outlet pipe, and tighten the underside nut hand-tight plus ¼ turn. Reconnect the flush lever or chain. Turn the water supply back on slowly and test flush several times. The tank should empty in one smooth 4–6 second rush with no hesitation.
How to Fix a Toilet Siphon (Diaphragm Repair)
The diaphragm (thin flexible disc at the base) is the #1 failure point. A torn or hardened diaphragm prevents the initial water column from forming. Follow these exact steps:
Complete the isolation, flushing, and full siphon removal exactly as described above.
On the removed siphon, locate the bottom base plate or cap (usually held by screws or a twist-lock). Unscrew or unclip it carefully. Lift out the old diaphragm. Note its exact orientation and shape—take photos.
If you have an exact replacement diaphragm (available at hardware stores for $3–8), install it now. If not, use the old one as a template and cut a new one from heavy-duty plastic (milk jug lid or thick folder plastic works in emergencies). The plastic must be flexible but not too thick—test fit before final cut. Ensure it sits flat with no wrinkles.
Place the new diaphragm in position. Reattach the base plate and tighten screws evenly. Hand-tighten only—overtightening cracks the housing. Apply silicone grease to the outlet seal.
Follow Step 6 from the cleaning guide. Flush 5–6 times while watching. The siphon should prime instantly with no partial flushes.
How to Replace a Toilet Siphon Unit
For units over 8–10 years old or with multiple failures, replace the entire 2-part siphon unit (modern push-fit designs make future repairs much easier).
Buy a 2-part push-fit siphon unit that matches your cistern outlet diameter (usually 1½” or 2″). Bring the old unit to the store or match model numbers. Cost is typically $12–25.
Complete full removal. Clean the cistern outlet hole thoroughly—remove any old scale or debris so the new seal sits flat.
Slide the new donut/washer seal over the outlet pipe. Lower the new siphon unit into the cistern so the outlet pipe passes through the hole. From underneath, slide the clamp plate and large plastic nut over the pipe. Hand-tighten the nut, then add ¼ to ½ turn with a wrench. Do not overtighten—porcelain can crack.
Reattach the flush lever or chain to the new siphon rod. Turn water supply back on slowly. Let the tank fill completely. Flush and observe: the tank should empty fully and quietly with no leaks around the base nut. Check for 5–10 minutes for any dripping.
Red Flags — Stop and Call a Plumber
If your toilet is over 15 years old or uses a non-standard siphon size, replacing the entire flush mechanism with a modern flapper or canister valve is often cheaper and more reliable long-term than repeated diaphragm repairs.
Toilet Siphon vs Flapper Valve
Flapper valves (standard in most U.S. toilets) use a rubber flapper that lifts and reseats with a chain. Siphon units have no such seal and rely purely on the siphon effect. Siphons tend to use less water for dual-flush models but are more prone to diaphragm failure. Flappers are simpler to repair but can leak if the rubber warps. See our full comparison in one-piece vs two-piece toilet guide.
Toilet Bowl Siphon Jet Problems & Maintenance
The siphon jet hole at the front of the bowl initiates the trapway siphon. Mineral buildup here causes weak flushes even with a perfect cistern siphon. Clean monthly with a descaler and small brush. For related issues, read our guide on best flushing toilets.
Dual Flush Siphon Toilet Repair Tips
Dual-flush siphons often have a half-flush air vent in the stem. If the half flush fails, check that the vent holes are clear. Full replacement units for dual-flush models are widely available and usually push-fit. Always match the exact stem length and outlet diameter.
• If the diaphragm is torn or hardened → replace it first (15-minute fix).
• If the full siphon is over 10 years old → upgrade to a modern 2-part unit.
• If you see cracks in the cistern or persistent leaks after repair → stop and call a plumber immediately.
• Proper siphon maintenance keeps your toilet flushing reliably and prevents surprise water bills or floor damage.
FAQ
What is a toilet siphon and how does it differ from a flapper?
A toilet siphon is a bell-shaped mechanism in the cistern that uses gravity to create a vacuum and empty the tank. A flapper is a rubber seal that simply lifts to let water out. Siphons are common in dual-flush and some imported models while flappers dominate U.S. gravity toilets.
Why is my toilet siphon not working or flush weak?
The most common cause is a perished diaphragm that fails to prime the siphon. Other causes include mineral buildup in the bell or outlet pipe, or low water level in the tank. Clean and replace the diaphragm before considering a full unit swap.
Can I replace a toilet siphon diaphragm myself?
Yes—most homeowners can do it in under 20 minutes with basic tools. The key is turning off the water, emptying the tank, and using the exact size diaphragm or a universal replacement cut from heavy plastic sheet in an emergency.
How often should I clean or maintain my toilet siphon?
Clean the siphon and diaphragm every 12–18 months or whenever you notice weaker flushes. In hard water areas, inspect every 6 months to prevent scale buildup that prevents the siphon from priming correctly.
Is it better to replace the whole siphon unit or just the diaphragm?
For units older than 8–10 years, replace the entire 2-part siphon. Newer designs make future diaphragm changes tool-free and last longer than patching the old bell housing.
Does a weak toilet siphon affect the bowl trapway siphon?
Yes. If the cistern does not deliver a strong rush of water, the siphon jet in the bowl cannot fully fill the trapway, breaking the bowl siphon before waste is completely removed.
A properly functioning toilet siphon should empty the tank in one clean 4–6 second rush. If yours hesitates or leaves water behind after following these steps, the problem has moved beyond the cistern—contact a licensed plumber to avoid hidden leaks or code violations.
For more expert toilet repair guidance, see our complete best flushing toilets guide or learn toilet installation costs in the USA. Keep your siphon maintained and your toilet will flush reliably for years.