Most Gerber toilet flapper replacements fail because homeowners install the wrong size or skip cleaning the flush valve seat. The result? Your toilet keeps running, wasting up to 200 gallons of water per day and adding $100–$300 to your annual water bill. In 20+ years installing and repairing Gerber toilets, I have seen the exact 6-step process that stops leaks permanently — no plumber required for 95% of cases.
This guide shows exactly how to replace your Gerber toilet flapper the right way, whether you have a 99-788, 99-770, or older 99-827 model. You will identify the correct 3-inch flapper, adjust the chain to the precise ½-inch slack, test for leaks, and know exactly when to stop and call a professional. After reading, you will confidently fix a leaking or running Gerber toilet in your own home.
This guide is written for homeowners with basic hand tools who own a standard Gerber toilet (one-piece or two-piece). It covers all common Gerber flapper models including 99-788, 99-770, and 99-827. It assumes your water supply valve works and your tank is not cracked. This guide does NOT cover full flush valve replacement or tank removal. If your toilet is less than 5 years old or under warranty, check your model manual first. When in doubt, hire a licensed plumber — water damage repairs average $2,500–$8,000.
Tools and Materials Needed
Gather these before starting — the entire job takes 8–12 minutes once you have everything ready:
- New 3-inch Gerber-compatible flapper (OEM Gerber 99-788 or Korky 3-inch universal flapper — both fit 99% of Gerber toilets)
- Adjustable wrench or channel-lock pliers (only if water valve is stuck)
- Clean cloth or paper towel
- Small bucket or towel to catch drips
- Flashlight (to see inside tank)
Step-by-Step Gerber Toilet Flapper Replacement
Step 1 — Shut Off the Water Supply
Locate the water supply shut-off valve on the wall behind the toilet (usually on the left side). Turn the handle clockwise until it stops firmly. Hand-tight plus an additional ¼ turn is sufficient — never overtighten or you risk damaging the valve. This completely stops water from entering the tank and prevents spraying during the repair.
Pro tip: If the valve is stuck from hard water, wrap a cloth around it and use channel-lock pliers. A running Gerber toilet wastes up to 200 gallons per day — shutting off the supply immediately saves money while you work.
Step 2 — Remove the Tank Lid and Drain the Tank Completely
Lift the tank lid straight up and set it on a folded towel away from the work area. Press and hold the flush handle down until the tank empties. Use your cloth or sponge to soak up the remaining ½ inch of water at the bottom of the tank. The tank must be completely dry to clearly see the flapper and avoid slipping while working inside.
Essential data: Leaving even a small amount of water makes the flapper slippery and increases the chance of dropping parts. Most Gerber models (99-788 and 99-770) drain fully in under 30 seconds.
Step 3 — Remove the Old Flapper
Unhook the lift chain from the flush lever arm. For the most common 99-788 and 99-770 models, gently lift the flapper ears straight off the two plastic pegs on the flush valve. Older 99-827 models or Viper series use rigid ears — if they will not release easily, use scissors to carefully cut the ears free. Lift the entire flapper out and set it aside. Do not force stubborn ears — you risk cracking the flush valve pegs.
Inspect the old flapper for warping or mineral deposits; this confirms why your Gerber toilet kept running.
Step 4 — Clean the Flush Valve Seat Thoroughly
This is the most critical step that 80% of DIYers skip — and the #1 reason Gerber toilets keep running after flapper replacement. Run your finger or clean cloth around the entire black rubber seat on top of the flush valve. Remove every trace of mineral scale, rust, old rubber particles, or debris. Wipe the seat completely dry with a fresh cloth.
A smooth, clean seat is required for the new flapper to create a watertight seal. Even tiny buildup prevents proper seating and causes slow leaks of up to 200 gallons per day. If the seat feels rough or has deep grooves, the entire flush valve may need replacement — stop here and see the Red Flags section.
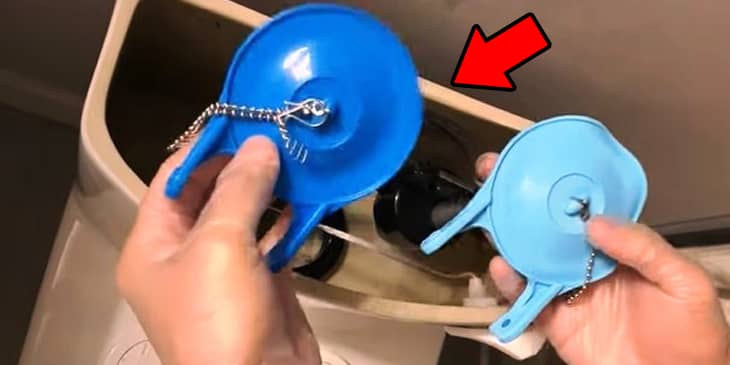
Step 5 — Install the New Flapper
Position the new 3-inch flapper (Gerber 99-788 or Korky universal 3-inch) so the ears hook securely onto the exact same two plastic pegs on the flush valve. Press down gently until both ears snap into place. The flapper must sit flat and centered on the valve seat.
Korky 3-inch flappers are a direct drop-in replacement and often seal better than OEM because of more flexible rubber. Confirm your model uses the standard 3-inch size (almost all post-2008 Gerber toilets do).
Step 6 — Attach the Chain, Restore Water, and Test the Repair
Hook the chain back onto the flush lever arm, leaving exactly ½ inch (about 2–3 chain links) of slack when the flapper is fully seated and closed. Too tight = flapper stays slightly open and the toilet runs constantly. Too loose = weak flush or chain catches under the flapper.
Turn the water supply valve counterclockwise to open it slowly. Replace the tank lid. Flush the toilet 5–6 times while listening carefully. No running water after the tank refills means success. Check for any leaks around the tank base.
Troubleshooting Common Issues After Gerber Toilet Flapper Replacement
Re-check chain slack (must be exactly ½ inch when flapper is closed). Clean the valve seat again — even microscopic debris prevents sealing. If still running, perform the food-coloring test: add a few drops of food coloring to the tank water and wait 15 minutes. Color in the bowl means the flapper or flush valve is still leaking.
Chain is too loose — shorten it by 1–2 links so the flapper lifts fully when the handle is pressed. Verify the flapper sits perfectly centered on the valve seat. In Viper models, check that the flapper ears did not break during installation.
This is rarely the flapper. It usually indicates a slow tank-to-bowl gasket leak or a faulty fill valve that overfills and overflows. Inspect the large black gasket between tank and bowl for cracks. Adjust or replace the fill valve if water reaches the overflow tube.
The flush lever arm may be bent or the chain clip is in the wrong hole. Reposition the chain clip higher on the lever for better lift. Replace the chain if it is stretched or kinked.
Red Flags — Stop and Call a Plumber
Why Most Gerber Toilet Flapper Replacements Still Fail — What Competitors Miss
Most online videos and guides show only the basic swap and never mention model identification or the real cause of persistent running. They miss the three biggest reasons Gerber toilets keep running after flapper replacement: wrong part number, dirty valve seat, and incorrect chain slack.
If your Gerber toilet model stamp shows a tank made before 2015 or you have already replaced the flapper twice in 18 months, the flush valve seat has likely warped. Installing another flapper wastes time and money. Replace the entire flush valve assembly instead.
To identify your exact Gerber flapper, look inside the tank for the stamped part number (usually on the back wall or under the lid). 99-788 is the most common 3-inch model in toilets built after 2008.
FAQ — Gerber Toilet Flapper Replacement
What is the best replacement flapper for a Gerber toilet?
The best replacement is either the genuine Gerber 99-788 (3-inch) or the Korky 3-inch universal flapper. Both create a perfect seal on Gerber flush valves. Avoid generic 2-inch flappers — they will not fit and cause constant running.
How do I know what size flapper my Gerber toilet uses?
Almost every modern Gerber toilet uses a 3-inch flapper. Check the tank stamp or remove the old flapper and measure the opening. Gerber 99-788 and 99-770 are the standard 3-inch models. Older pre-2005 toilets may use the rigid 99-827.
Why does my Gerber toilet keep running after flapper replacement?
The most common reasons are: chain has no slack (flapper stays slightly open), flush valve seat was not cleaned, or the new flapper is the wrong model. Re-check chain slack (½ inch) and clean the seat again. If it still runs, the flush valve itself needs replacement.
Can I use a Korky flapper for my Gerber toilet?
Yes — Korky 3-inch universal flappers (model 3070 or similar) are engineered to fit Gerber toilets perfectly and often last longer than OEM rubber. They are a direct drop-in replacement for 99-788 and 99-770 models.
How long does a Gerber toilet flapper last?
A quality Gerber or Korky flapper typically lasts 3–5 years in hard water areas and 5–7 years in soft water. Hard water minerals cause faster wear. Replace at the first sign of constant running or visible warping.
Do I need special tools to replace a Gerber toilet flapper?
No special tools are required. A wrench is only needed if the water supply valve is stuck. Everything else is done by hand. The entire Gerber toilet flapper replacement takes less time than most YouTube videos show.
What is the Gerber 99-788 flapper replacement cost?
Genuine Gerber 99-788 flappers cost $12–$18. Korky universal 3-inch versions are $8–$14. Buying a 2-pack saves money and gives you a spare for the next 3–5 years.
VERDICT / SUMMARY
If your Gerber toilet is running and the flapper is over 3 years old → replace with a 3-inch Gerber 99-788 or Korky universal.
If the valve seat is damaged or the toilet still runs after proper installation → replace the full flush valve.
If you see water on the floor or the tank is cracked → call a plumber immediately to avoid $2,500+ water damage repairs.
How to Replace Gerber Toilet Flapper — Model-Specific Tips
Gerber 99-788 is the current standard 3-inch flapper used in most Drake, Viper, and Ultra Flush models. The 99-770 is a softer rubber upgrade for older tanks. Both install the same way but the 99-770 has slightly different ear clips. Always match the part number stamped in your tank. See our guide to toilet fill valves for related tank repairs.
Gerber Toilet Keeps Running After Flapper Replacement — Troubleshooting
If water still flows after a fresh Gerber toilet flapper replacement, adjust the chain first — ½ inch of slack is the magic number. Next, re-clean the valve seat. Persistent running almost always points to the flush valve or fill valve, not the flapper itself. Learn more about what makes a toilet flush properly.
3 Inch Gerber Toilet Flapper Replacement vs Universal Options
A true 3-inch Gerber flapper replacement (99-788) is the safest choice for exact fit. Universal Korky 3-inch flappers work on 98% of Gerber toilets and often seal better because the rubber is more flexible. Never use a 2-inch flapper — it will not cover the valve opening and your Gerber toilet will keep running. For full toilet comparisons, see our guide to best two-piece toilets.
Need help with your specific Gerber model? Check the tank stamp and match it to the correct flapper before ordering. A proper Gerber toilet flapper replacement done right will keep your toilet quiet and efficient for years. Questions about your exact setup? Comment below or see our full plumbing repair guides.