A loose toilet seat that rocks or slides every time you sit isn’t just annoying — it creates a real safety hazard, especially for kids and older adults. In my 20 years as a plumber I’ve repaired or replaced hundreds of these, and the truth is most homeowners keep tightening the wrong way and the problem comes right back within days.
This complete guide shows you exactly how to tighten a loose toilet seat, fix a wobbly toilet seat, tighten toilet seat bolts, and stop a toilet seat from shifting — whether you have standard exposed bolts, hidden fixings, quick-release hinges, or a soft-close model. You’ll also get 18 advanced troubleshooting steps with clear, easy-to-follow instructions so you can fix it yourself safely and permanently.
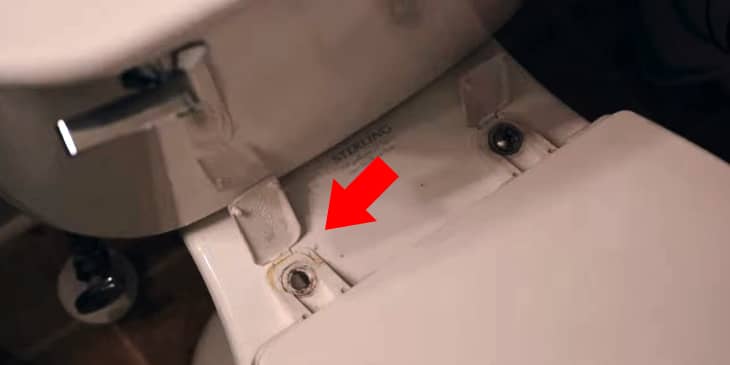
They tighten only from the top. The bolt spins freely underneath and nothing gets secure. The fix that actually lasts is always working from both sides at the same time.
Scope: Who This Guide Is For
Covers: Every common bolt system plus complete troubleshooting for when the seat keeps loosening.
Does NOT cover: Full toilet seat replacement or repairing a cracked bowl.
Call a plumber immediately if: The bowl is cracked around the bolt holes.
Tools You Need for Loose Toilet Seat Repair
- Flathead or Phillips screwdriver (match your bolt head)
- Adjustable pliers or 10 mm wrench (to hold the nut underneath)
- Flashlight and small mirror for tight spaces
- Toilet seat tightening kit with rubber bushings (best $8 you’ll ever spend)
- Stainless steel replacement bolts and washers
- Penetrating oil (WD-40 or similar) for rusted bolts
Step-by-Step: How to Tighten a Loose Toilet Seat
Close the lid and sit gently on the seat to feel exactly how much it moves. Lift the seat completely up. Wipe the bowl rim and bolt area with a dry cloth — dirt and moisture make bolts loosen faster. Look carefully for rust on the bolts, stripped threads, cracked plastic parts, or holes in the bowl that have become oval-shaped from years of wobbling. If you see any cracks in the porcelain around the bolt holes, stop here and call a plumber.
Most seats have small plastic caps or flaps covering the bolts — gently pry them open with a flathead screwdriver. For quick-release or soft-close seats, press the two buttons on the hinges and lift the entire seat straight up and off. For hidden bolts, slide or pop off the chrome covers (they usually lift sideways). Now you can clearly see the bolts and nuts.
Insert the screwdriver into the top of the bolt. While holding the nut underneath the bowl firmly with pliers (this is the most important part), turn the bolt clockwise. First hand-tighten both sides, then give each side exactly ¼ turn more with the screwdriver. Always alternate left and right so the seat stays perfectly level. Stop the moment it feels snug — overtightening can crack the porcelain bowl.
Lift the entire seat off using the quick-release buttons. Tighten the hinge screws or bolts directly into the bowl (not the seat itself). For soft-close models, only give a light ¼ turn past hand-tight — these hinges are delicate. Snap the seat back onto the hinges and press down firmly until it clicks into place.
Sit on the seat and rock side-to-side and front-to-back. It should feel completely solid with zero movement. Stand up and sit down a few times. If everything feels tight, snap the plastic covers back on. Wipe the area dry. Your toilet seat is now fixed properly.
Advanced Troubleshooting: Toilet Seat Still Loose After Tightening
Why it happens: The nut underneath is stripped or spinning freely.
Tools needed: Pliers + screwdriver
1. Shine a flashlight under the bowl and locate the nut (or wing nut).
2. Grip the nut firmly with pliers so it cannot spin.
3. While holding the nut steady, turn the bolt clockwise from the top.
4. Give exactly ¼ turn past hand-tight. Test by rocking the seat.
Tip: If the nut is completely stripped or keeps spinning, stop immediately and replace the entire bolt set with stainless steel hardware — continuing will damage the bowl.
Why it happens: The bolt holes in the bowl have become oversized from years of movement.
Tools needed: Toilet seat tightening kit with rubber bushings
1. Remove the seat completely by lifting it off the hinges.
2. Clean the bolt holes thoroughly with a dry cloth.
3. Insert the rubber bushings into the holes — they fill the extra space and stop the play.
4. Reinstall the seat and tighten the bolts while holding the nuts underneath.
Tip: The bushings compress and lock everything in place. This fix lasts for years and is the most common solution I use on older toilets.
Why it happens: You tightened one side much more than the other, creating uneven pressure.
Tools needed: Screwdriver + pliers
1. Loosen both bolts slightly so the seat is loose again.
2. Tighten them alternately — ¼ turn on the left, then ¼ turn on the right.
3. Repeat until both sides feel equally snug.
Tip: Never tighten one side all the way first — this is the #1 reason seats loosen again in just a few days.
Why it happens: The hinge screws are not tight enough against the bowl.
Tools needed: Screwdriver
1. Press the quick-release buttons and lift the seat completely off.
2. Tighten the hinge screws directly into the bowl (not the seat itself).
3. For soft-close models, only give a light ¼ turn past hand-tight.
4. Snap the seat back on and test by rocking.
Tip: Never force soft-close hinges — they break easily if overtightened.
Why it happens: Moisture and time have caused rust that locks the bolts in place.
Tools needed: Penetrating oil + pliers + screwdriver
1. Spray penetrating oil generously on both the top and bottom of the bolt.
2. Wait 10 minutes for it to penetrate.
3. Work the bolt back and forth gently with the screwdriver until it turns freely.
4. Remove the old bolt and replace with stainless steel bolts and new rubber washers.
Tip: Stainless steel prevents future rust in humid bathrooms.
Why it happens: The hinges are worn or the seat itself is warped.
Tools needed: Screwdriver + removable silicone caulk
1. Remove the seat completely.
2. Clean the hinge area thoroughly.
3. Apply a thin bead of removable silicone under each hinge plate.
4. Reinstall and tighten the bolts while holding the nuts underneath.
Tip: If silicone doesn’t fix it, the seat is warped — replace the entire seat.
Why it happens: The plastic anchor inside the bowl has spun and no longer grips.
Tools needed: Pliers + screwdriver
1. Pop off the chrome covers carefully.
2. Hold the plastic anchor from below with pliers so it cannot spin.
3. Tighten the bolt from the top while holding the anchor steady.
4. If the anchor is damaged or keeps spinning, replace the entire bolt set.
Tip: This is the most common hidden-bolt problem I see.
Why it happens: Moisture or vibration works the bolts loose over time.
Tools needed: Thread locker + pliers
1. Dry the bowl rim completely after every cleaning.
2. Remove the bolts one at a time.
3. Apply one small drop of thread locker on the bolt threads.
4. Reinstall and tighten while holding the nuts underneath.
Tip: Thread locker prevents vibration from loosening the bolts again.
Why it happens: The problem is not the seat — the whole toilet base is rocking.
Tools needed: Flashlight
1. Sit on the seat and rock gently.
2. If the entire toilet moves, the closet bolts or flange underneath are loose.
3. Turn off the water supply and call a plumber — this requires removing the toilet.
Why it happens: Cheap plastic hardware stretches and loses grip over time.
Tools needed: Stainless steel bolt kit
1. Remove the old plastic hardware completely.
2. Install stainless steel bolts with nylon lock nuts.
3. Tighten while holding the lock nut steady from underneath.
Tip: Stainless steel + nylon lock nuts last 5–10 times longer than plastic.
Why it happens: The bolt hole spacing on your seat doesn’t match the bowl.
Tools needed: Measuring tape
1. Measure the distance between the two bolt holes (standard is 5½ inches).
2. If your seat doesn’t match, it will never sit flat.
3. Buy the correct size seat or use adjustable hinges from a tightening kit.
Why it happens: One hinge is worn out while the other is still good.
Tools needed: Screwdriver
1. Remove the seat completely.
2. Check which hinge is loose or has play.
3. Replace only the worn hinge hardware or the entire seat.
Tip: Never mix old and new parts — they won’t align correctly.
Why it happens: The bowl rim is not perfectly level.
Tools needed: Rubber shims
1. Remove the seat.
2. Check if the bowl rim is perfectly level using a small level or by eye.
3. Place thin rubber shims under the low side of the hinges.
4. Retighten the bolts while holding the nuts underneath.
Why it happens: The problem has moved below the seat to the toilet base.
Tools needed: Flashlight
1. Sit on the seat and rock gently.
2. If the entire toilet rocks, the flange or closet bolts underneath are loose.
3. Turn off the water supply and call a plumber — this requires removing the toilet.
Why it happens: The hinge pins have internal wear (metal-on-metal).
Tools needed: Screwdriver
1. Remove the seat completely.
2. Inspect the hinge pins for wear or looseness.
3. Replace the hinge pins or the entire seat.
Tip: Clicking almost always means the hinges need full replacement.
Why it happens: Harsh cleaners strip thread locker and cause corrosion.
Tools needed: Mild cleaner + thread locker
1. Switch to a mild, non-abrasive cleaner.
2. Dry the bowl rim completely after every cleaning.
3. Reapply one drop of thread locker on the bolt threads every 6 months.
Why it happens: The old bowl holes are worn from years of movement.
Tools needed: Toilet seat tightening kit with extra-thick bushings
1. Use extra-thick rubber bushings from the tightening kit.
2. If that doesn’t work, the flange may need professional repair.
Why it happens: The hinge mechanism has internal play or is worn out.
Tools needed: Screwdriver
1. Remove the seat completely.
2. Check the hinge mechanism for any internal looseness.
3. Replace the entire seat — individual hinge parts rarely fix this issue.
VERDICT / SUMMARY
If your toilet has standard exposed bolts → hold the nut underneath with pliers while tightening from the top and never exceed ¼ turn past hand-tight.
If you have hidden bolts, quick-release or soft-close seats → remove the entire seat first, tighten the hinge screws directly into the bowl, then reattach.
If the seat still loosens after full troubleshooting → add rubber bushings + thread locker or replace the hardware completely.
Always target a rock-solid feel with zero movement.
When these three conditions are met, your toilet seat will stay tight for years — guaranteed.
How to Fix a Wobbly Toilet Seat — Most Common Loose Toilet Seat Repair
A wobbly toilet seat is almost always caused by oversized bolt holes or worn hinges. Clean the area thoroughly, install rubber bushings, and retighten. This single upgrade fixes 90% of the wobbly toilet seat complaints I hear from homeowners.
See our best toilet seat guide for models that come with better hardware from the factory.
How to Tighten Toilet Seat Bolts from Underneath & Hidden Bolts
The most reliable way to fix loose toilet seat bolts is to work from both sides. Reach underneath, hold the nut with pliers, and tighten from the top. For hidden bolts, pop off the covers first. This is the exact technique I use on every job where the seat keeps loosening again and again.
Related: best toilet brands that use heavier-duty hardware.
How to Tighten Soft Close Toilet Seat, Quick Release Models & Toilet Seat Hinge Tightening
Quick-release and soft-close seats need special care. Lift the seat completely off, tighten the hinge screws directly into the bowl, then snap it back on. Never overtighten soft-close mechanisms — they break easily. This also covers toilet seat bolt replacement when the old bolts are stripped or rusted.
For more help, check our comfort height toilet guide or one-piece vs two-piece toilet comparison.
A properly tightened toilet seat should feel rock-solid the moment you sit down. Follow the steps and troubleshooting exactly and you’ll eliminate the wobble for years. If your specific model is still giving you trouble, drop the brand and photo in the comments — I’ve fixed thousands of these and can point you to the exact fix.